 (3 votes, average: 5.00 out of 5)
Higher Trust = More Sales
(3 votes, average: 5.00 out of 5)
As a leading encryption provider, we often receive inquiries from individuals and businesses dealing with hacked WordPress sites. They frequently ask, “My WordPress site has been hacked. What should I do?”
Invariably, the first step for how to fix a hacked WordPress website is not to panic. Considering that a hacked WordPress site can have serious consequences, we know that’s easier said than done. These negative impacts include a drop in search engine rankings, potential exposure of visitors to harmful viruses, damage to your reputation, and even loss (or theft) of sensitive site data.
Take a deep breath and read on to learn how to kick that hack to the curb!
Every day, Colorlib estimates there are more than 13,000 cyber attacks on WordPress websites, totaling more than 4.7 million annually! Keep your WordPress website from being the next target. Protect yourself from the threats lurking on the web.
If you suspect your WordPress site has been hacked, there are ideally three critical phases to fix the issue:
With this in mind, let’s explore the eight steps you can take to remedy the situation when you realize “my WordPress site is hacked.”
Picture this: you wake up one morning, ready to check on your website, only to find that it’s been hacked! Panic sets in. The best thing to do is to stop and take a deep breath.
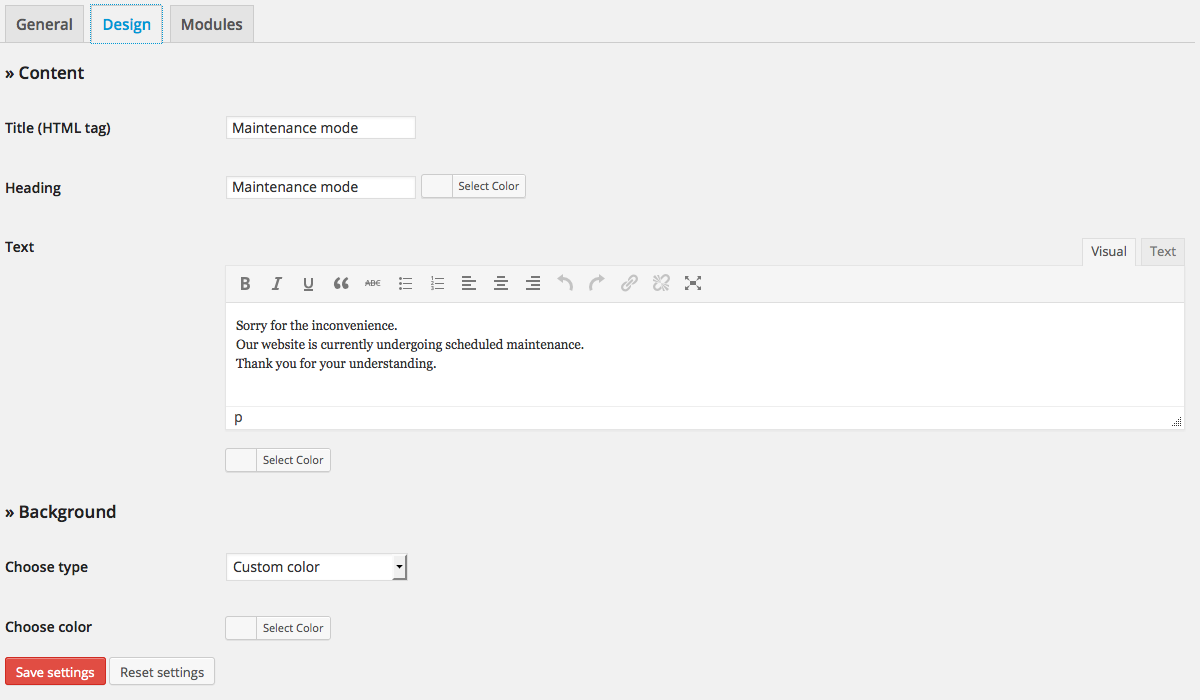
First and foremost, don’t let a compromised website ruin your reputation! Instead, enter maintenance mode to protect your visitors and brand.
With a WordPress plugin, you can quickly activate a message letting visitors know your site is undergoing scheduled maintenance rather than being hacked. Customize the “Maintenance mode” message with your logo and brand colors to maintain credibility.

Even if you can’t log in immediately, activate maintenance mode to prevent further damage and protect your website and reputation.
When dealing with a potential website hack, it’s important first to identify the attack and determine its severity. To do this, ask yourself five critical questions while navigating the affected site.
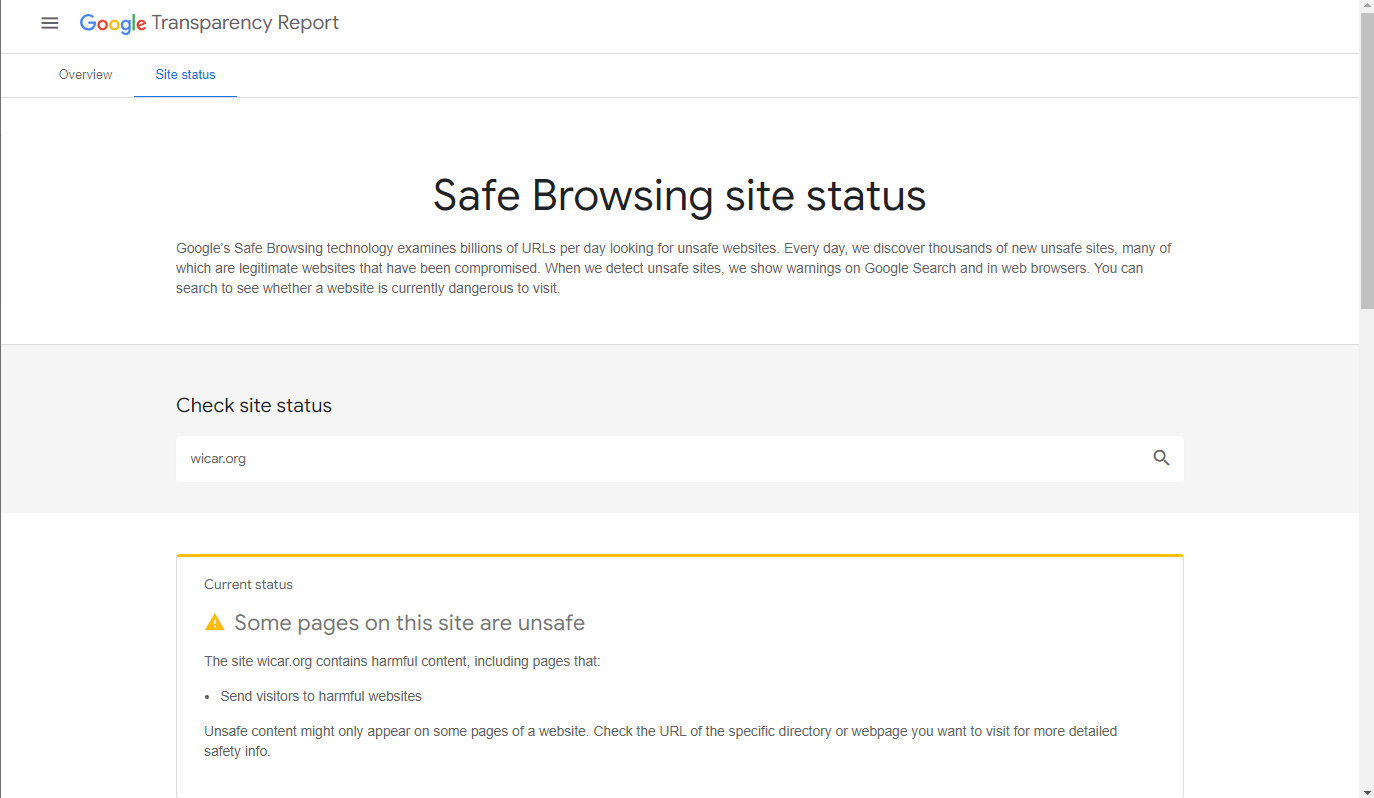
Run the above checks to determine the extent of malware infections on your WordPress site. The Google scan report will swiftly pinpoint any malware infections that may be causing spam, malicious downloads, or redirects. Please take note of the answers to these questions to help identify the hack or explain it to others.
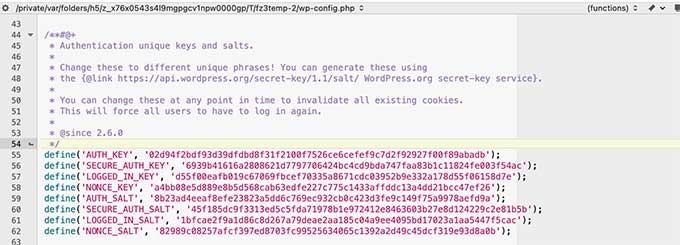
It’s important to change your passwords before you start cleaning up any potential hacks. And we’re not just talking about your WordPress login — you’ll also need to reset passwords for all admin users, your SFTP, your database, and even your hosting provider. Why? So don’t allow the hacker to strike again mid-process; take control of your security.
Of course, to be on the safe side, you also should change all your passwords again after finishing the cleanup. This way, if the temporary passwords were compromised before you successfully removed all malware or malicious code from your site, the temp passwords can’t be used against you once you’ve removed all of the malware. (I.e., this way, bad guys can’t go back in after the fact and insert malware or malicious code all over again.)
Once you’ve confirmed a hack on your WordPress website, it’s time to act and clean it. First, we suggest you run a WordPress security plugin to determine which files have been altered. Then, once you have the infected file report, go over the steps for manually cleaning a hacked WordPress site.
If you can’t access the WordPress dashboard, use SSH or Linux terminal commands to check the files manually.
Perform an integrity check on three core folders: wp-includes directory, wp-admin, and root folders.
(Note: Handle core files carefully to avoid overwriting wp-content or wp-config.php.)
While examining modified themes and plugins within the /uploads/ directory, you must be cautious about preserving any custom code changes you’ve made to your theme. Follow these steps:
It’s essential to note that if you’ve integrated custom codes or modifications into the files you’re replacing, you risk losing these tailored elements. Proceed carefully when replacing files, especially if personalized code enhancements are present.
Custom files are crucial to the functionality of your WordPress site, but they can also be vulnerable to malware and other threats. That’s why it’s essential to have recent backups should any changes be detected. SiteLock is a tool that automatically performs daily backup updates for your website’s database and files.
Backing up your custom WordPress files is crucial for site security, but relying on one backup is insufficient. Consider creating multiple copies in different formats and storing them in diverse geographic locations to enhance your plan. Adhere to the “3-2-1 backup rule” for added protection. A comprehensive backup plan ensures your site’s valuable data is well-protected and resilient in any crisis.
Not having a backup means you’ll have to manually scan your files for suspicious activity and delete them to eliminate any threats. This can be time-consuming and add to your workload, as you’ll also need to recreate any lost files. Stay tuned as we discuss more about the WordPress backups later in the article.
After WordPress installation cleanups, it’s time to clean up your database. However, scanning malware in the database manually is a time-consuming process. So, instead, use a WordPress database plugin to scan any malicious code and unfamiliar records, then clean the database manually.
To manually remove the malware:
With the above steps, you mitigate the risk of backdoors created through a database injection!
Later in the article, we’ll discuss why hackers create backdoor malware to bypass authentication in WordPress files.
To keep your WordPress website from falling into the wrong hands, be diligent about who has access to the admin dashboard. Take a quick peek at the users’ section and limit administrator access to secure access to your WordPress site.
Hackers love to create sneaky entrances into your website, and one of their favorite tricks is to create unauthorized privileged user accounts in your WordPress admin area. These accounts give them access to your site even after you’ve cleaned up any malware. So, stay diligent and watch for any new admin accounts you or your team need to recognize. If you spot any, delete them ASAP to keep your site safe and secure.
When managing your WordPress platform, limiting the number of privileged users is important. Instead, focus on assigning essential user roles like author, editor, and contributor based on what access each user needs to do their job. By doing this, you can ensure that only those who need access to certain features have it, keeping your site secure and organized.
Hackers employ clever techniques to sneak into websites, including leaving hidden backdoors.
A backdoor is a secret route that hackers exploit to access your website without detection. These access points are designed to imitate essential site files like wp-config.php and critical directories such as /uploads, /themes, and /plugins. They are deliberately positioned in incorrect directories, making them more challenging to identify.
For example, hackers can access and manipulate server content undetected in a WordPress installation by disguising these files with unsuspecting names, like WordPress’s xml-rpc.php. (This file enables remote connections to WordPress and can be used to create backdoors.)
To uncover these covert backdoors, look for recently modified files (already discussed earlier in the article). In addition, you can find hidden pathways hackers use to compromise website security by identifying suspicious changes.
Prevent hackers from sneaking into your system repeatedly, understand backdoors, and use PHP function recognition to detect them.
Even though you’ve fixed the WordPress site hack, don’t let your guard down yet. There are additional measures to take to prevent another attack from happening. Keep your site safe and secure with these post-hack tips.
After battling a hack, it’s crucial to eliminate those pesky malware warnings. When your site gets infected, it often lands on blocklists maintained by antivirus software (Symantec, McAfee, etc.) and search engines (Google, Mozilla, etc.).
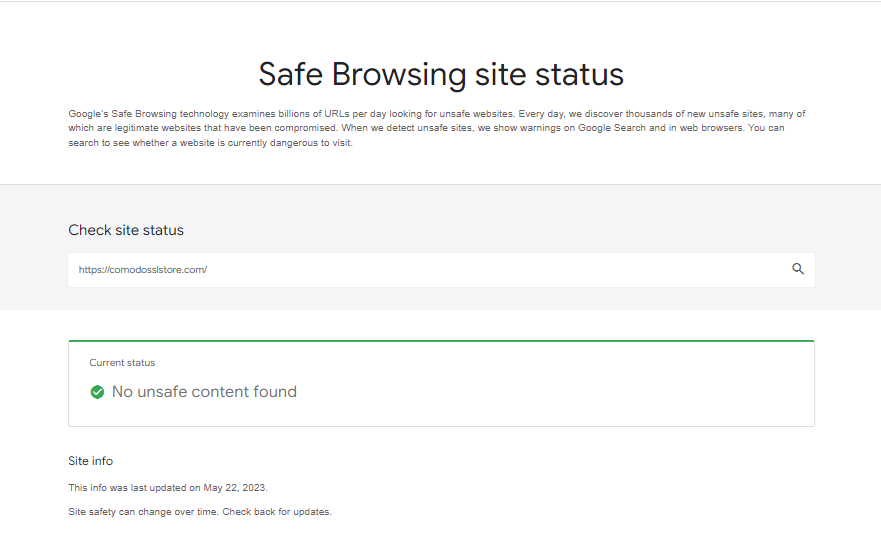
To regain your site’s reputation, it’s crucial to eliminate these warnings. Once you’re confident your site is clean, request a review from the software and browser authorities to restore its trustworthiness. You can request this type of review through Google Search Console, for example. The process for this varies depending on the nature of the hack, but it’s critical to safeguard your site’s integrity to ensure it is no longer flagged as a security risk.
Hackers search for vulnerabilities in WordPress sites to inject malware and steal data, causing harm to the site and visitors. Of course, nobody wants their website hacked, but if it happens, we have just discussed several remediation methods you can use to fix the situation.
For WordPress beginners or those lacking technical expertise, seeking professional services is a wise choice. With various providers offering urgent plans, you can have your site back up and running within hours.
Alternatively, if you prefer a do-it-yourself (DIY) approach or have budget constraints, this comprehensive guide provides step-by-step instructions to fix hacked WordPress sites. Alongside this DIY guide, opt for advanced WordPress defense services like SiteLock that empower you to safeguard your site and regain control over its security.
![]()
Don’t let malware compromise your WordPress site. Instead, take prompt action, and ensure your website remains protected against future threats.
