 (7 votes, average: 5.00 out of 5)
Higher Trust = More Sales
(7 votes, average: 5.00 out of 5)It is very common to use the same SSL certificate for multiple servers, when a load-balancer is utilized to share the load of a website across several different servers. This can be easily managed by following our stepwise guide of moving an SSL certificate from one server to another.
Please note that several certificate authorities would need you to have a server license for each server on which you want to install an SSL certificate, in spite of using the same private key. Also, it is not secure to copy the SSL certificate and use the same private key on another server. Because if attackers attacks either of the server and gets the private key, they will be able to listen in on the connections other servers are making.
Before getting started with the procedure, you need to make sure that you have successfully installed the SSL certificate on the web server. The procedure mainly involves the following principle steps:
Step 1
Start Menu >> Run.
Step 2
As shown below, type ‘mmc’ and click Ok.
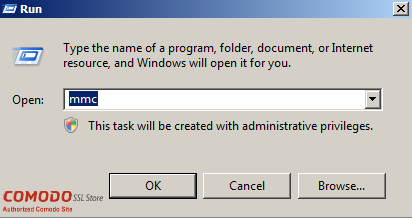 Figure 1
Step 3
Choose the option ‘Add/Remove Snap-in…’ from ‘File’ menu.
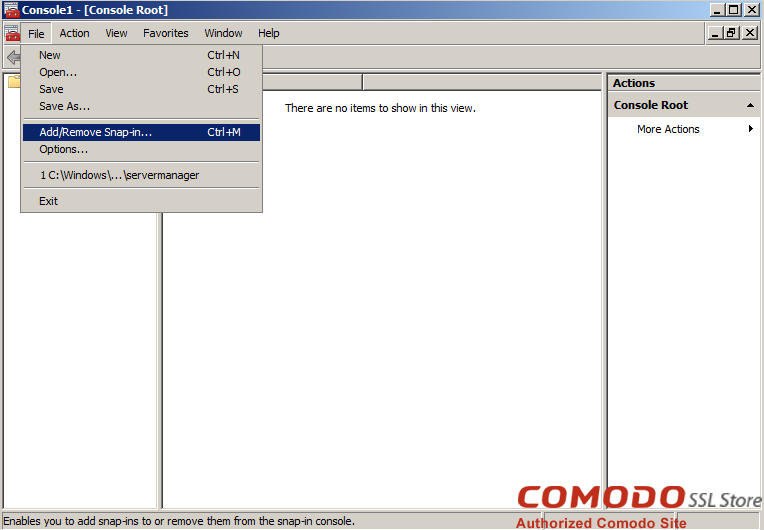 Figure 2
Step 4
Click on ‘Add’ button and double click on Certificates if you are using Windows Server 2003.
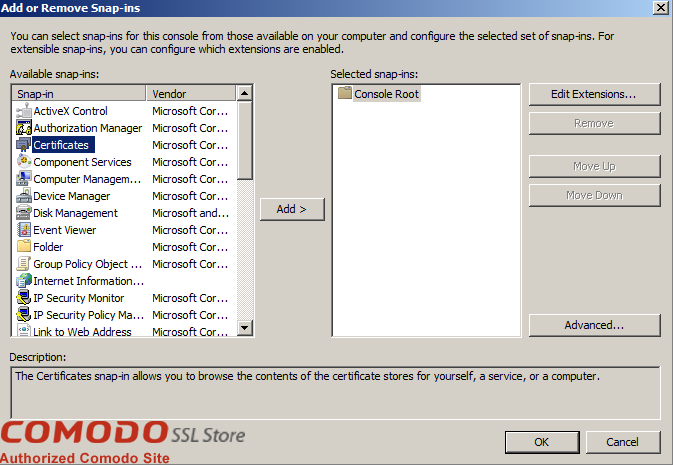 Figure 3
Step 5
Select ‘Computer Account’ and click on Next to proceed.
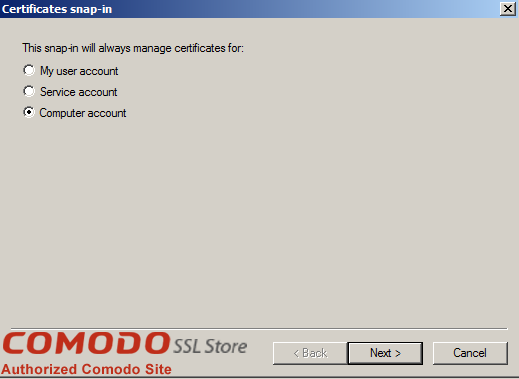 Figure 4
Step 6
Leave Local Computer selected and click on Finish.
 Figure 5
Step 7
If you are using Windows Server 2003, click the ‘Close’ button. Click OK.
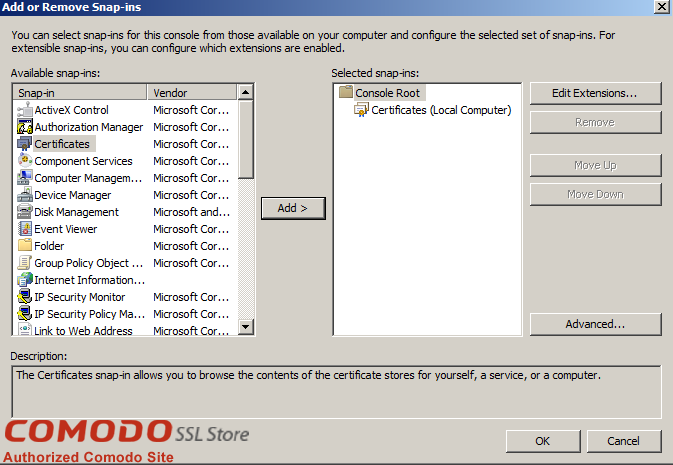 Figure 6
Step 8
Click on the ‘+’ sign next to Certificates in the left pane to expand the menu.
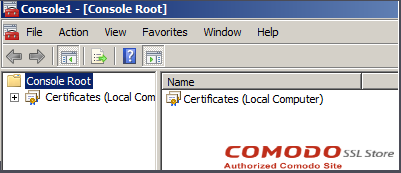 Figure 7
Step 9
From the expanded menu, click on ‘+’ sign next to ‘Personal folder. Now click on ‘Certificate’ folder. After that Right click on the certificate you wish to export and select ‘All Tasks’. Then click on ‘Export’.
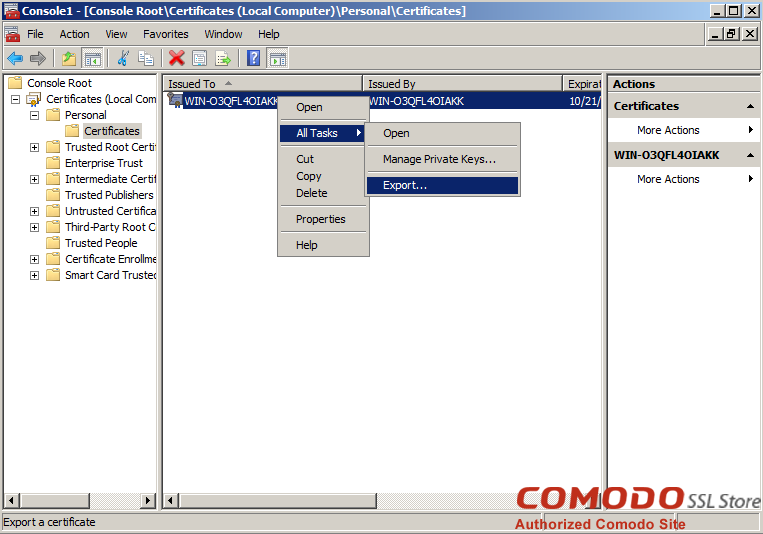 Figure 8
Step 10
Click on ‘Next’ in the Certificate Export Wizard.
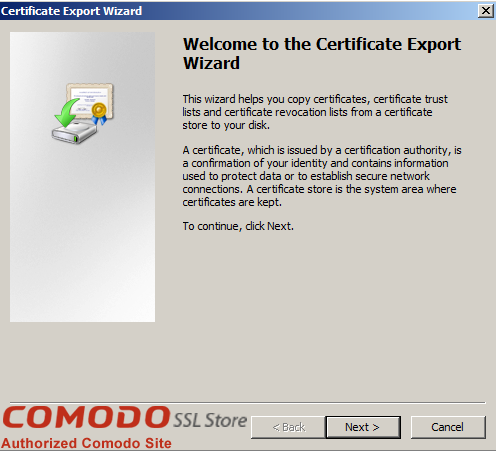 Figure 9
Step 11
Choose ‘Yes, export the private key’ and click ‘Next’.
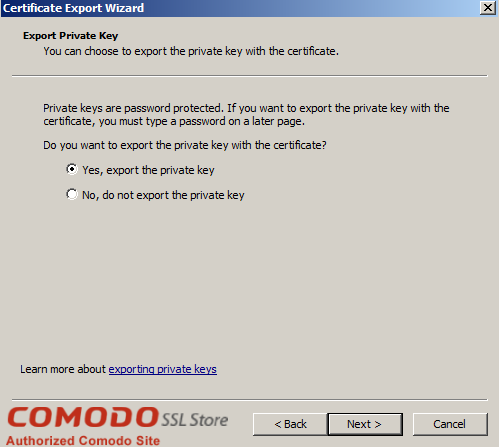 Figure 10
Step 12
Click the checkbox ‘Include all certificates in the certification path if possible’ and click ‘Next’.
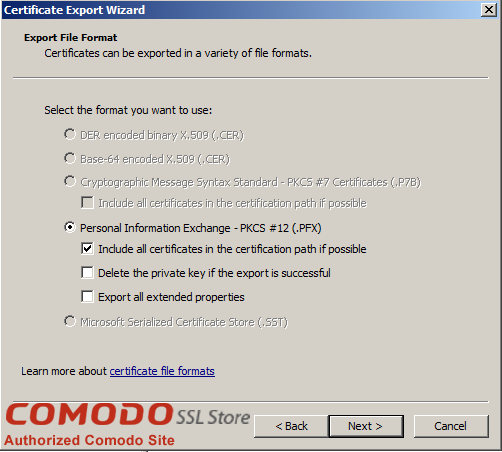 Figure 11
Step 13
After that, enter a password and confirm it. This password will be needed whenever the certificate is imported to another server.
 Figure 12
Step14
Click ‘Browse’ and save the ‘.pfx’ file to a preferred location. Choose a name such as ‘mydomain.pfx’ and click ‘Next’.
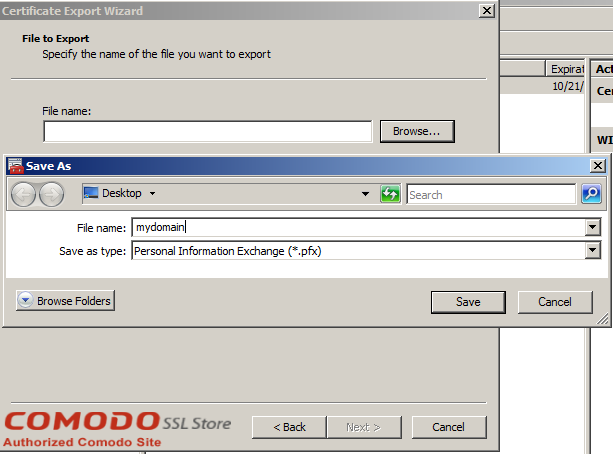 Figure 13
Step 15
Click ‘Finish’, with this step a ‘.pfx’ file having certificates and private key is saved to the location specified by you.
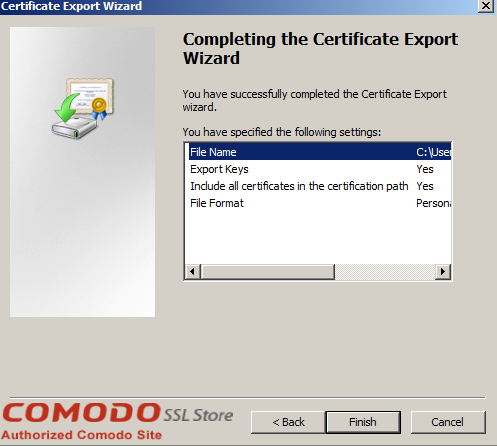 Figure 14
After you have successfully exported the certificate from the original server, you now, need to copy the .pfx file that was created by you in the new server. Now follow these steps to import the certificate:
Step 1
From the ‘Start’ menu click on ‘Run’.
Step 2
Type ‘mmc’ and proceed by clicking ‘OK’.
Figure 15
Step 3
From the ‘File’ menu, select ‘Add/Remove Snap-in…’
Figure 16
Step 4
Click on ‘Add’ button and double-click on ‘Certificates’, if you are using Windows Server 2003.
Figure 17
Step 5
Select ‘Computer account’ from all the options and click ‘Next’.
Figure 18
Step 6
Leave the option ‘Local computer’ selected.
Figure 19
Step 7
If you are using Windows Server 2003, you need to click on ‘Close’ button and ‘OK’ to continue.
Figure 20
Step 8
Now Right-click on the Personal Folder. Then select ‘All Tasks’ and continue by clicking on ‘Import…’
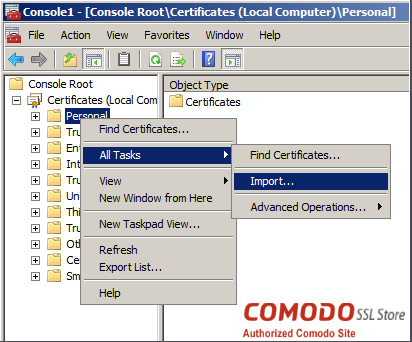 Figure 21
Step 9
Click ‘Next’ in the Certificate Import Wizard.
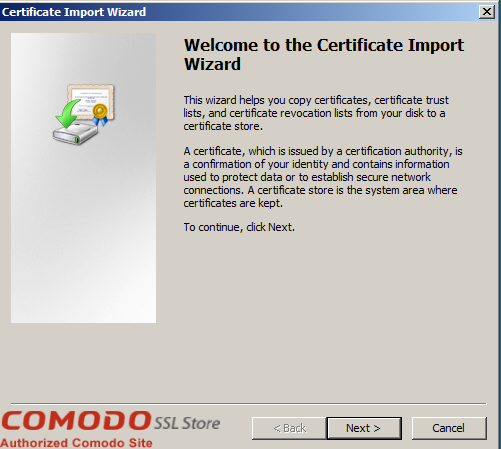 Figure 22
Step 10
Click on ‘Browse’ button. Change the file type from ‘X.509…’ to ‘Personal Exchange’ (*.pfx, *p12). Now find the .pfx file that you copied over and click ‘Open’ and then click on ‘Next’ button.
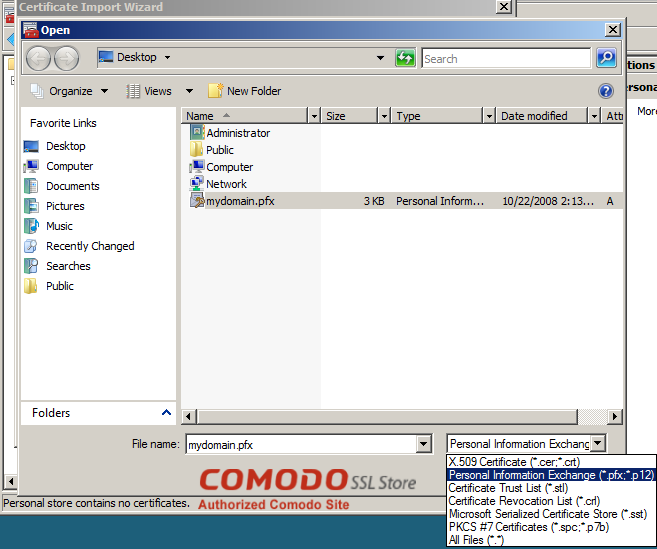 Figure 23
Step 11
Enter the password set by you when exporting the .pfx file. Then click on ‘Mark this as exportable’. This way you can export the certificate from this machine and the original as well. Click ‘Next’.
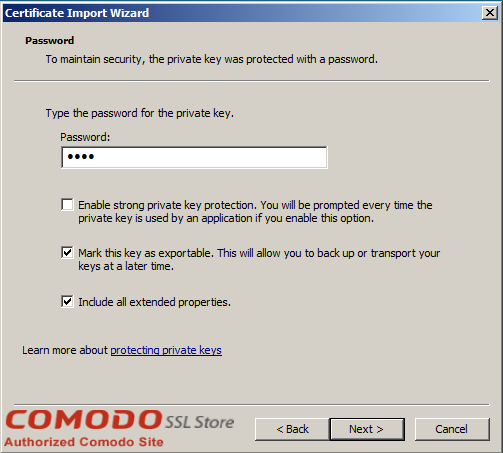 Figure 24
Step 12
Click ‘Automatically select the certificate store based on the type of certificate’. Then click ‘Next’.
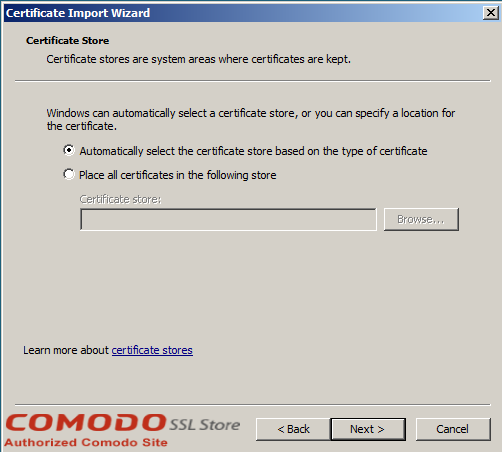 Figure 25
Step 13
To complete the Wizard click ‘Finish’.
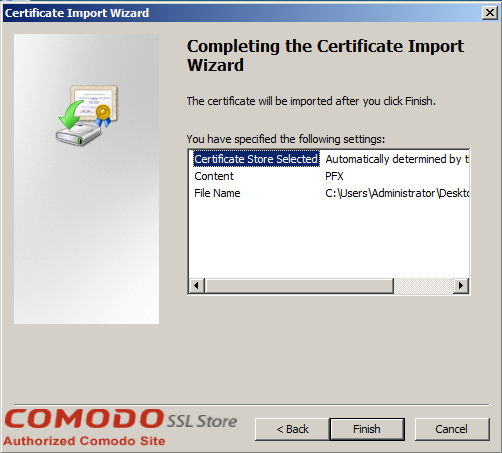 Figure 26
Step 14
Now click on ‘Refresh’ button in the toolbar and find your certificate in the folder of ‘Certificates’ under ‘Personal’. Double click on it and look for ‘You have a private key that corresponds to this certificate’ at the bottom of the certificate dialog, to verify the correct import of the certificate.
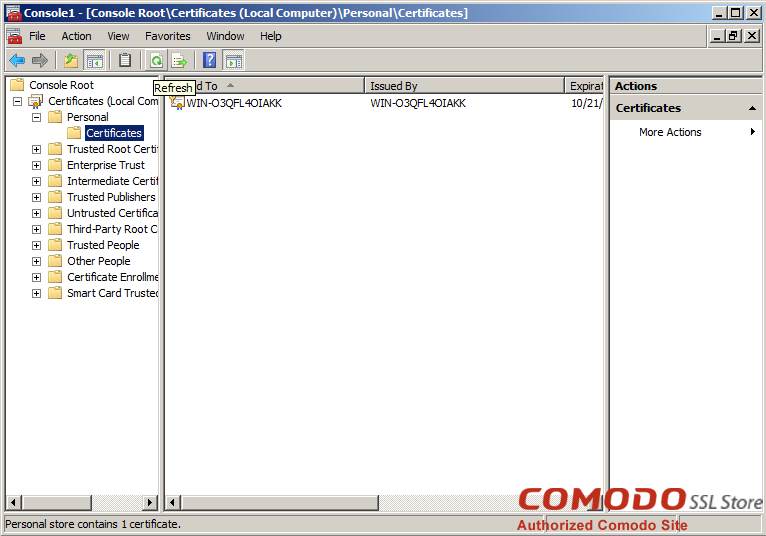 Figure 27
Step 15
Now close the MMC console and you don’t need to save any changes there.
Steps to Assign the SSL certificate
After you have imported the .pfx file, either you need to assign the certificate to the site in IIS.
Step 1
Open the Internet Information Services (IIS) Manager, right-click on the website that needs certificate. Then click on ‘Properties’.
Step 2
Click on ‘Directory Security’ tab. To run the Server Certificate wizard, click on ‘Server Certificate’ button.
Step 3
In case you already have a certificate on that website, you will need to remove it and then start the wizard again.
Step 4
Now, click on ‘Assign an existing certificate’. Then click ‘Next’ to continue.
Step 5
Select the new certificate that you imported. Click ‘Next’.
Step 6
Click on the ‘Finish’ button. For the certificate to start working on the assigned website, you need to restart the IIS.
With these steps, the procedure of moving an SSL certificate from one server to another can be completed very easily.
