
 (10 votes, average: 4.70 out of 5)
Higher Trust = More Sales
(10 votes, average: 4.70 out of 5)Installing an SSL Certificate on your own server can be a huge challenge unless you speak fluent computer. Most of us don’t. But for some reason, many of us still attempt to install SSL on our own servers.
If you have the right guide and made informed decisions along the way, then you have nothing to worry about.
But be honest, that doesn’t always happen. In fact, a lot of times it doesn’t happen. So before you do any installing, here are 9 common mistakes to avoid when installing SSL certificates.
Trust us, put down the mouse and keyboard and back away from the server until you’ve finished reading this—it could save you time and a massive headache.
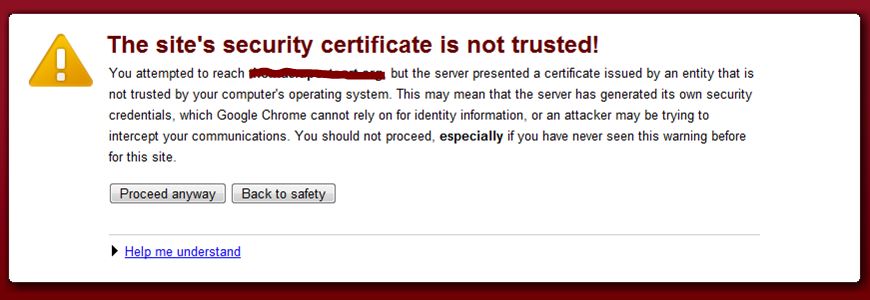
We’ll just come right out and say it: don’t sign your own certificate. Signing your own certificate means you’re authenticating yourself—you’re vouching for yourself. How trustworthy is that!? Have you ever asked someone a question about something they’ve said and they give a response like, “because I said so”—as if that should be proof enough for you? That’s what self-signing a certificate is like. Of course you’re going to claim you’re legitimate. Who would admit they’re not. In turn, the browsers are going to look at your self-signed certificate with an air of suspicion which will prompt them to warn your website’s visitors that, ‘hey, this site may not be trustworthy.’This isn’t a trivial error, either. Browsers will show a full-page warning, preventing visitors from getting to your site without clicking through a dialogue telling them they are putting themselves at risk. And that’s bad for business—for obvious reasons.
Don’t self-sign your certificate and don’t pick the wrong Certificate Authority (CA). This is true on two levels. First you want to make sure that your CA is trusted, meaning that the browsers have authorized them to issue SSL certificates in the first place. Otherwise you’re going to run into the same problems you’d have with a self-signed certificate where the browsers are going to warn your visitors about the trustworthiness of your website. The second level is that not all CA’s are created equal. You may want to go with the bargain bin CA to save money and that’s fine, but the returns on your investment aren’t going to be the same as if you went with a well-recognized CA like Comodo. Better CA’s often package other security solutions with their certificates and also include more recognizable trust seals, which are proven to boost conversions and consumer confidence. So choose wisely.

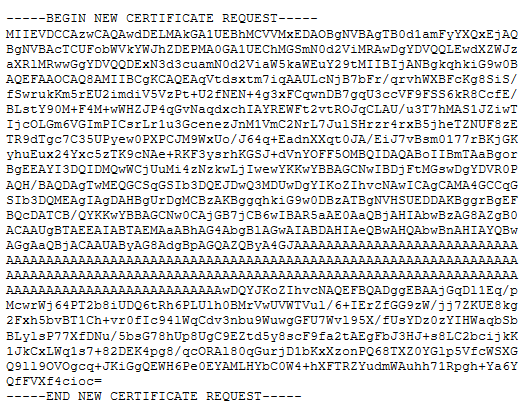
The Certificate cannot be generated if the Certificate Signing Request (CSR) is done incorrectly. The CSR process will differ depending on the software you use (or sometimes you can use a third party system, like we have at ComodoSSLStore.com, to generate it). It’s absolutely vital that when you generate your CSR, you take your time with the process because if you rush through it and make a mistake you can really mess up the rest of the installation, or perhaps not even get your certificate issued at all. That means both following the steps given by the software you’re using and also entering your information so that it is absolutely correct, and by absolutely correct we mean so that all the details match the site you’re registering for, the company you’re registering for, etc. It’s also important that you verify the CSR in the initial stage of generation to make sure there are no errors present—lest you run into a major headache later on.
The Certificate Authority is going to need to vet you and your organization before they issue the certificate. For a Domain Validated certificate this is as simple as having the correct WHOIS registry information and being able to respond to an email. However, for better certificates like Organization Validation and Extended Validation, you’ll need to furnish some information in order to satisfy all the requirements. A lot of times a company or organization will make a mistake that prevents them from getting validated. It may be that your registration information is out of date and doesn’t reflect what you put down on your CSR. It could be that your company operates under a DBA and it’s not listed properly. It could be something as simple as your organization not having a publicly listed phone number. Regardless, you will need to make sure that all of your ducks are in a row before you go through authorization or at best there will be delays, at worst you won’t be issued a certificate at all.
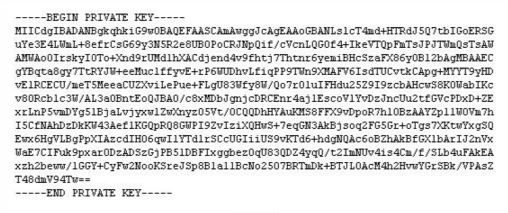
When you generate your CSR, your computer also creates a file known as the Private Key. This key is vital, as it unlocks the encrypted communications being passed from your visitor’s web browsers to your web server. Without it, your certificate won’t work at all. So it goes without saying that the security of your private key is crucial. If you somehow lose it, you have to get the CA to reissue your certificate. And if it gets compromised, as in you accidentally share it with someone, your website is no longer secure and you have to get the CA to reissue your certificate. Don’t make it so you have to get the CA to reissue your certificate. Take care of your private key.
You know that male stereotype about how guys don’t like to ask for directions? Well, when it comes to installing SSL—don’t be THAT guy. Unless you’re an IT professional – in which case you wouldn’t be reading this article – chances are you don’t know your way around a server well enough to install SSL without a little bit of help. So follow the guide. It’s that simple. Most guides are fairly comprehensive and will give you step-by-step instructions – down to command lines – on how to properly install your SSL certificate, how to configure your server, etc. It’s all there. So why would you be headstrong and eschew that kind of direction in favor of trying to do it with nothing but a little grit and your best instincts? Got it? Good. Follow the guide.
Detailed instructions are given here to help you install the SSL Certificate on the server of your choice:
You may come to a point in the installation where it becomes obvious you have made a mistake. You are at a crossroads. You could either continue plowing forward, hoping you will somehow fix the problem and complete the installation without issue. Or you could pick up the phone or go online via chat and contact customer support. We know, you’ve ‘had bad experiences with customer support before.’ Nobody wants to go that route. But in this instance, you’d be crazy not to. Our customer support can walk you through the steps you need to finish the installation, or in some cases they may be able to install it for you themselves. Either one is definitely preferable to spending a few more hours trying to retrace your own steps, fix your mistakes and finish the installation process by yourself. And think of the headache that comes along with that. If you get in a pinch, just call support. That’s what they’re there for.
Usually when you finish any task you want to test to make sure your work paid off, right? This could mean spinning a newly replaced bike tire or turning on a freshly rebuilt engine. Regardless, you need to be sure to test your work. Why would you go through all of the trouble of installing an SSL certificate and not make sure it’s working properly? So go ahead and check your website after finishing installation to make sure that your SSL certificate is working properly. Otherwise you may think you’ve done your part and that you’ve secured your site and taken care of your customers when in fact you’ve done none of that. You can conduct a basic test by trying to visit your site with the HTTPS protocol – just type “https://your-domain.com” into the address bar and look for the padlock (or Green Address Bar with EV Certificates) to know if it’s working properly. We know you’re probably anxious to get up and go get some fresh air after the mental gymnastics it took to install this thing, but follow this last step and see it all the way through.
SSL Checker Tool: https://comodosslstore.com/ssltools/ssl-checker.php
This is the last one, we promise. These SSL Certificates, the ones you’re installing, they don’t last forever. They typically have lifespan of 1-2 years. This is because the CA’s need to continually authenticate your identity if they’re going to keep vouching for it. This means you have to renew them. Don’t forget that. You won’t be alone if you do forget, big companies like Apple, Google and Yahoo have made the same mistake—but it will mean your site is temporarily unsecured, or maybe even inaccessible. Nobody wants that. So make sure to write down your expiration date in a place that you’ll remember it. We send out email reminders to all our customers to help out. If you do forget it, you can always open the certificate file to check on it again. Just make sure when you start approaching that date that you make plans to renew. And try to give yourself a little bit of time. Don’t do it the day before. Just one more helpful tip from us.
Manage SSL Renewal Emails: https://bit.ly/manage-ssl-renewal-emails
