Rate this article: 
Secure your website with SSL encryption for enhanced user trust and data protection. This guide outlines the steps to install an SSL certificate on IIS 10, running on Windows Server 2019, ensuring a secure and encrypted connection. Additionally, we’ll show you how to set up HTTP to HTTPS redirects, ensuring secure encrypted connections for all visitors.

Before we proceed, you’ll need to purchase a Comodo SSL certificate. If you haven’t acquired one yet, you can purchase it at a discounted price right here on comodosslstore.com.
Secure significant savings by purchasing your Single Domain SSL certificate directly. Save on a Comodo Single Domain SSL Certificate, starting at just $7.95 per year.
Compare Single Domain Certificates
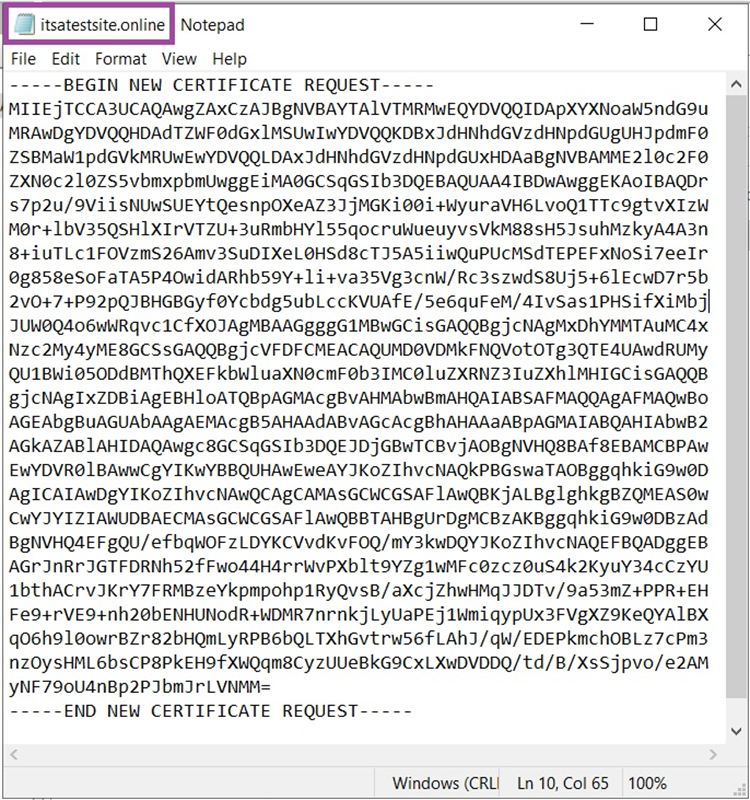
The first step involves generating a CSR (Certificate Signing Request) for a Single SSL Certificate on Windows Server 2019 with IIS 10. Save the CSR locally on your computer, ensuring it’s not publicly accessible. You can customize the CSR name as needed; for example, we’ve named our CSR as itsatestsite.online.csr, and it is stored securely on our local machine. Follow the steps below:
Proceed by submitting the certificate request to your selected certificate provider (e.g., Comodosslstore.com) and then complete the validation procedure to obtain the certificate.
1. Access your certificate provider’s website (e.g., comodosslstore.com) and input the generated CSR.

To fulfill the validation requirements according to the Certificate Authority’s (CA) specifications. This may involve tasks such as uploading an HTML file, adding a DNS record, or clicking a link in an email. In this example, the HTML File validation method is utilized.
1. Download the text file from your Comodosslstore account provided for authentication.
2. Open a command prompt with administrative privileges.
3. Execute the following command:
4. This command will create a “.well-known” folder within the “wwwroot” directory, and within that, a “pki-validation” folder.

5. Verify that the folders have been successfully created.
6. Upload the text file to your hosting web root directory for validation.
7. Visit the URL in your browser to ensure the file is accessible. In our example, the file was at
8. After validation (usually within 5 minutes), get your certificate bundle from the SSL provider via your technical email address or SSL account dashboard.

1. Access the IIS Manager interface.
2. Click on the Server name from the left column, then navigate to and double-click on Server Certificates.
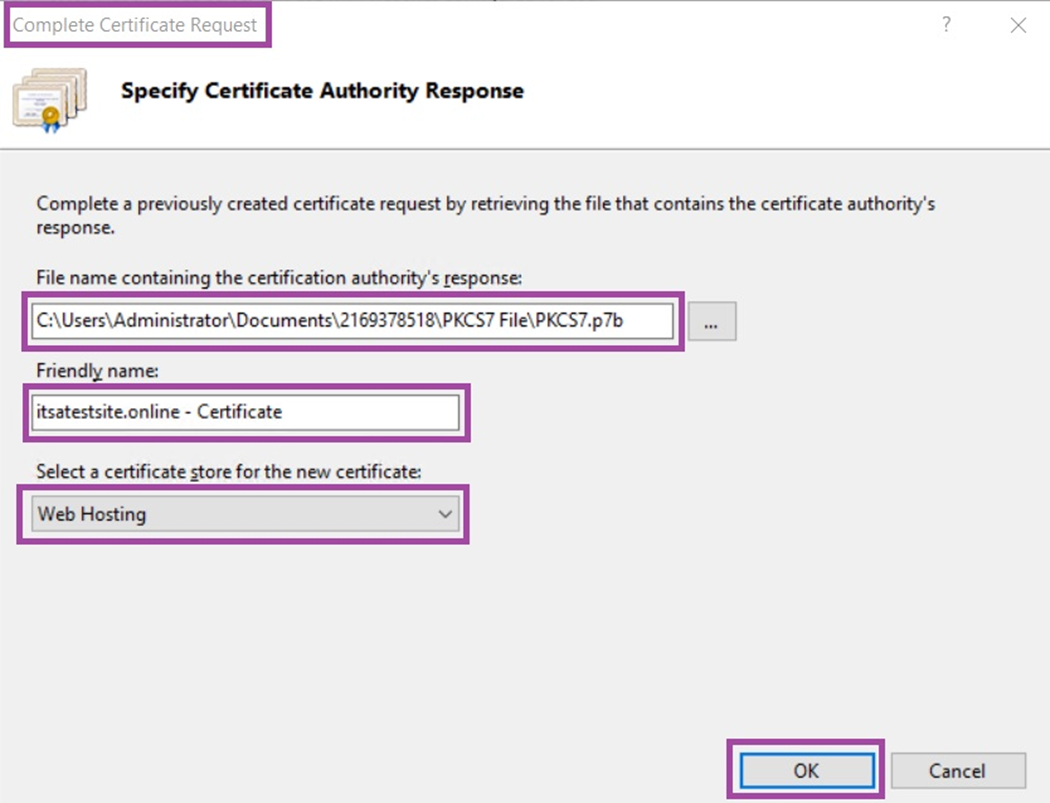
3. In the Actions pane, choose “Complete Certificate Request.”
4. Select the downloaded SSL certificate file, typically in .p7b format, located within the directory named “PKCS7 File.”
5. Assign the friendly name “itsatestsite.online – Certificate with chosen Web hosting” for easy identification, as in the example provided.
6. Follow the prompts to finalize the import process.
7. After completing the mentioned steps, click OK to finish the “Certificate Import.”
8. Verify the successful import by confirming the presence of the certificate among the server certificates, bearing the specified friendly name.

1. Open the IIS Manager and click on ‘Sites’ under the ‘Connections’ panel.
2. Navigate to the website you want to secure by clicking on its name.
3. Double click on the ‘Bindings’ option from the right column.
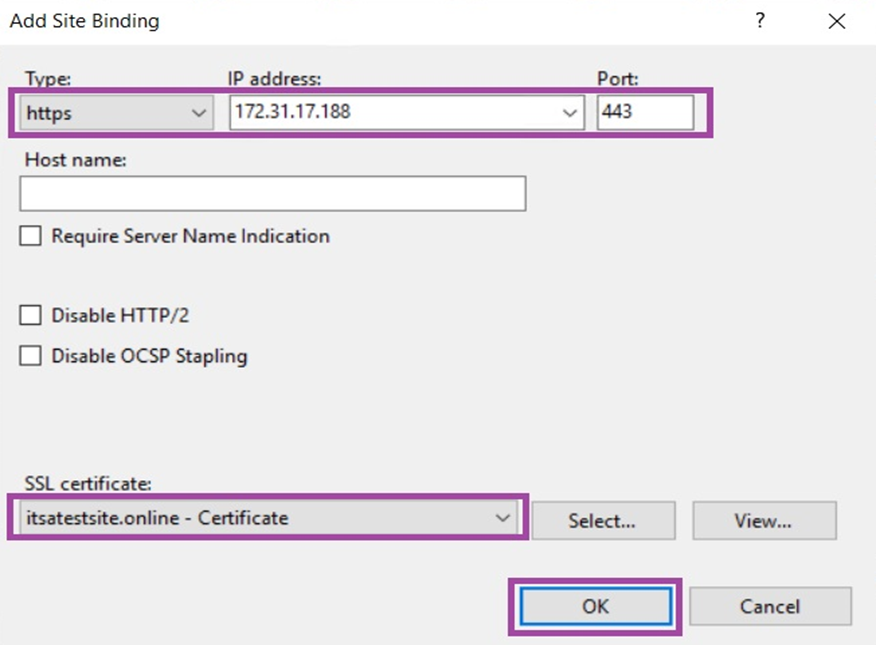
4. Add a new HTTPS binding.
5. Select the installed SSL certificate named “itsatestsite.online – Certificate with chosen Web hosting.”
6. Specify the IP address and port (default is 443).
After completing the binding configuration, your website is now accessible using both http and https URLs. Subdomains can also be accessed securely via https. Moving forward, we’ll configure automatic redirections to ensure that every visitor’s session is safeguarded with HTTPS.
1. Download and install the ‘URL Rewrite’ module via the Web Platform Installer in IIS. You can find the module at https://www.iis.net/downloads/microsoft/url-rewrite. After successful installation, access the IIS Manager. Upon reopening, you’ll notice the integrated “URL Rewrite” module in the IIS section, ready for configuration.

2. In the IIS Manager, right-click on your website and select “Explore” to navigate to its file location. Create a new file named “web.config”.
3. Open the web.config file in a text editor and insert the following XML configuration:
<?xml version="1.0" encoding="UTF-8"?>
<configuration>
    <system.webServer>
        <rewrite>
            <rules>
                <rule name="Redirect HTTP to HTTPS Protocol" stopProcessing="true">
                    <match url="(.*)" />
                    <conditions>
                        <add input="{HTTPS}" pattern="^OFF$" />
                    </conditions>
                    <action type="Redirect" url="https://{HTTP_HOST}{REQUEST_URI}" appendQueryString="false" />
                </rule>
            </rules>
        </rewrite>
    </system.webServer>
</configuration>
4. Save the ‘web.config’ file and restart the IIS service to apply the changes.
By following these steps, HTTP requests to your website will automatically be redirected to HTTPS, enhancing security, and ensuring a seamless browsing experience for your users.
Note: (Kindly consult with your development or design team before configuring rules or making any alterations to your IIS site. You may need to make changes to your website code or settings to support HTTPS URLs.)
Success—you’ve now installed an SSL certificate in Windows Server 2019 and IIS. Accessing your domain via http:// should now trigger an automatic redirection to the secure URL through the HTTPS protocol.
