Rate this article: 
Are you running an Apache web server on Windows 2022 and need to enable HTTPS? Protect your online presence with a single domain SSL certificate on Apache, operating on Windows Server 2022. We’ll show you how to seamlessly acquire, generate, and implement the certificate, complete with HTTP to HTTPS redirects for encrypted data transmission. By the end, your domain will boast robust HTTPS connections, ensuring enhanced security for your visitors.

Before proceeding, ensure you have acquired a Comodo SSL certificate. If you haven’t already obtained one, you can purchase it at a discounted rate exclusively through comodosslstore.com.
Secure significant savings by purchasing your Single Domain SSL certificate directly. Save on a Comodo Single Domain SSL Certificate, starting at just $7.95 per year.
Compare Single Domain Certificates
Before securing your website with an SSL certificate, OpenSSL must be installed. If you haven’t already, download and install OpenSSL from the following link, as it’s not installed by default on Windows Server 2022.
https://slproweb.com/products/Win32OpenSSL.html
To generate a Certificate Signing Request (CSR) and a private key, follow these steps:
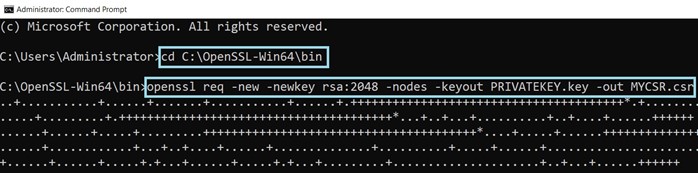
1. Open a command prompt and navigate to the directory where OpenSSL is installed.
cd C:\OpenSSL-Win64\bin
2. Execute the following command, replacing “PRIVATEKEY.key” with your preferred filename for the private key and “MYCSR.csr” with your desired name for the CSR file:
openssl req -new -newkey rsa:2048 -nodes -keyout PRIVATEKEY.key -out MYCSR.csr
After running the above command, you’ll input information for the CSR, including your domain name (Common Name), organization details, and location, ensuring all fields are filled. Once generated in the specified directory (C:\OpenSSL-Win64\bin), ensure the private key has restricted permissions to prevent public access. Both the private key and CSR are successfully generated.
The subsequent steps entail forwarding the certificate request to your designated certificate provider, such as Comodosslstore.com, and subsequently fulfilling the validation requirements to authorize the certificate issuance.
1. Execute the following command to copy the CSR file, ensuring to replace ‘MYCSR.csr’ with the actual filename if it differs:
notepad C:/OpenSSL-Win64/bin/MYCSR.csr
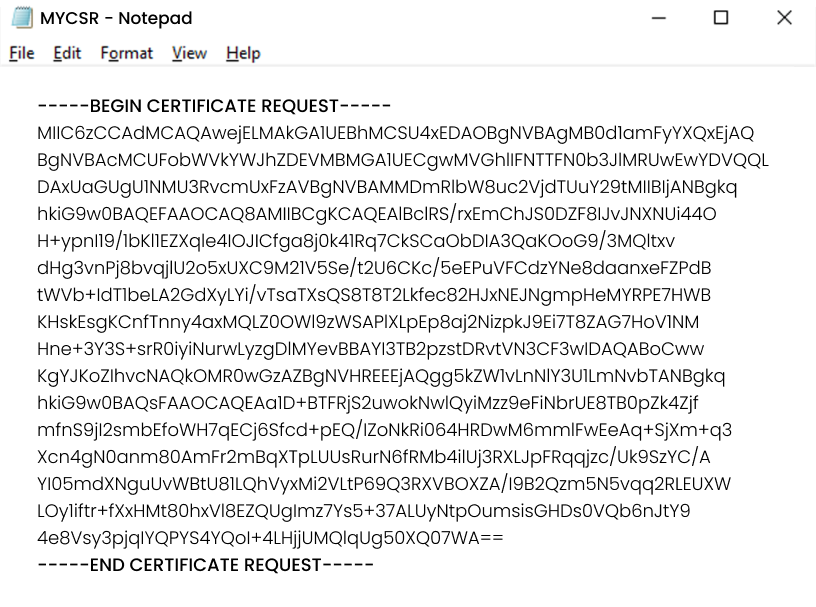
2. Visit your certificate provider’s website (e.g., comodosslstore.com) and proceed to submit the CSR securely.

3. When it comes to validating your domain for SSL certificates, you’ve got options. Here’s a rundown of the methods available, and I’ve chosen ‘CNAME’ Domain Validation:

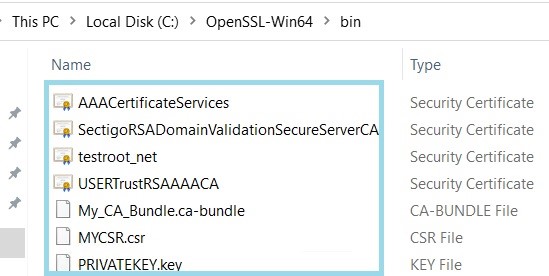
To install the SSL certificate, you’ll need to upload several files to your server. Our SSL certificate, issued by Comodo CA, a globally-trusted Certificate Authority, is downloaded from our account and securely uploaded to the ‘C:\OpenSSL-Win64\bin’ directory on the Windows server. Essential files include the SSL certificate (.crt), private key (.key), certificate chain (.ca-bundle), and Certificate Signing Request (.csr).
1. Locate Apache Configuration File:
Navigate to ‘C:\Apache24\conf\httpd.conf’ and open it in a text editor.
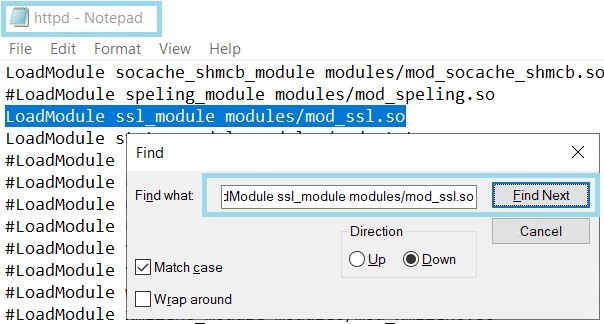
2. Enable SSL Module:
Confirm the activation status of the SSL module. Open the httpd.conf file located at ‘C:\Apache24\conf\httpd.conf’. Look for the line ‘LoadModule ssl_module modules/mod_ssl.so’. If it’s commented out, remove the comment symbol to enable the module. Note that the module is already enabled in this environment. Once any adjustments are made, save the file.
3. Configure Virtual Host and SSL:
Access the ‘httpd-ahssl.conf’ file located at ‘C:\Apache24\conf\extra’. Add the following entry after the line ‘Listen 443 https’ to enable SSL for your virtual host (be sure to update the file names to match your certificate and key file names):
<VirtualHost *:443>
    ServerName testroot.net
    DocumentRoot "C:\Apache24\htdocs"

    SSLEngine on
    SSLCertificateFile "C:\OpenSSL-Win64\bin\testroot_net.crt"
    SSLCertificateKeyFile "C:\OpenSSL-Win64\bin\PRIVATEKEY.key"
    SSLCertificateChainFile "C:\OpenSSL-Win64\bin\My_CA_Bundle.ca-bundle"

    # Additional SSL Configuration (Optional)
    # ...
</VirtualHost>
Save the file to activate the SSL module and configure the virtual host for secure communication on your Apache web server with the domain “testroot.net”. You’ve now installed the SSL certificate in Apache on Windows Server. Confirm proper HTTPS access by manually visiting the site in a web browser.
1. Open Windows PowerShell:
Navigate to the search bar and type ‘Windows PowerShell.’ Open Windows PowerShell with administrative privileges.
2. Create Firewall Rule:
Execute the following command in the PowerShell window to create a firewall rule named ‘Allow HTTP & HTTPS Ports’:
You’ll receive confirmation that the rule has been successfully applied. This rule ensures that your server can securely receive incoming HTTP and HTTPS requests over the internet.
Ensure your site’s security and user privacy by configuring Apache for automatic HTTP to HTTPS redirection. Follow these steps:
Locate Apache Configuration File:
Navigate to ‘C:\Apache24\conf\extra’.
Open httpd-ahssl.conf Configuration File:
Use a text editor with administrative privileges.
Add Virtual Host Entry for HTTP Redirection:
Insert a Virtual Host entry before the existing port 443 entry:
<VirtualHost *:80>
    ServerName testroot.net
    Redirect permanent / https://testroot.net/
</VirtualHost>
Configure Redirection Parameters:
Set ServerName to your domain for HTTP redirection. Use Redirect directive for a permanent (HTTP 301) redirection to HTTPS.
Save Changes and Restart Apache:
Save the modifications and restart Apache using ‘httpd -k restart’ in an administrative command prompt.
Enhance your website’s security with effortless HTTP to HTTPS redirection in Apache configuration.
Now that you’ve installed a Single Domain SSL certificate on your Windows server with Apache, it’s crucial to ensure its proper functioning. As a final step, visit your website using HTTPS to confirm that the SSL setup is working smoothly.
By following this guide, you’ll successfully install an SSL certificate on Apache, ensuring secure website connections on Windows Server 2022.
