Rate this article: 
 (21 votes, average: 4.38)
(21 votes, average: 4.38) (21 votes, average: 4.38)Before we dive into the Comodo code signing certificate instructions, let’s quickly clarify something. The days when you could generate a publicly trusted code signing certificate in your browser and install it on your computer or server are over. The industry upgraded its code signing baseline requirements back in 2023 to ensure that all publicly trusted code signing certificates’ private keys are generated only on secure hardware and aren’t handled directly.
Wondering how the new process of getting a code signing certificate works? Our Sectigo code signing instructions (otherwise known as Comodo code signing instructions) will walk you through the process with plenty of screenshots to help you along the way.
Getting a code signing certificate boils down to three key steps that we’ll cover in our Comodo code signing instructions:
![]()
Want to sign your software to assure users and make installation easier? We sell all Comodo code signing certificates at up to 42% off.
View Code Signing Certificates
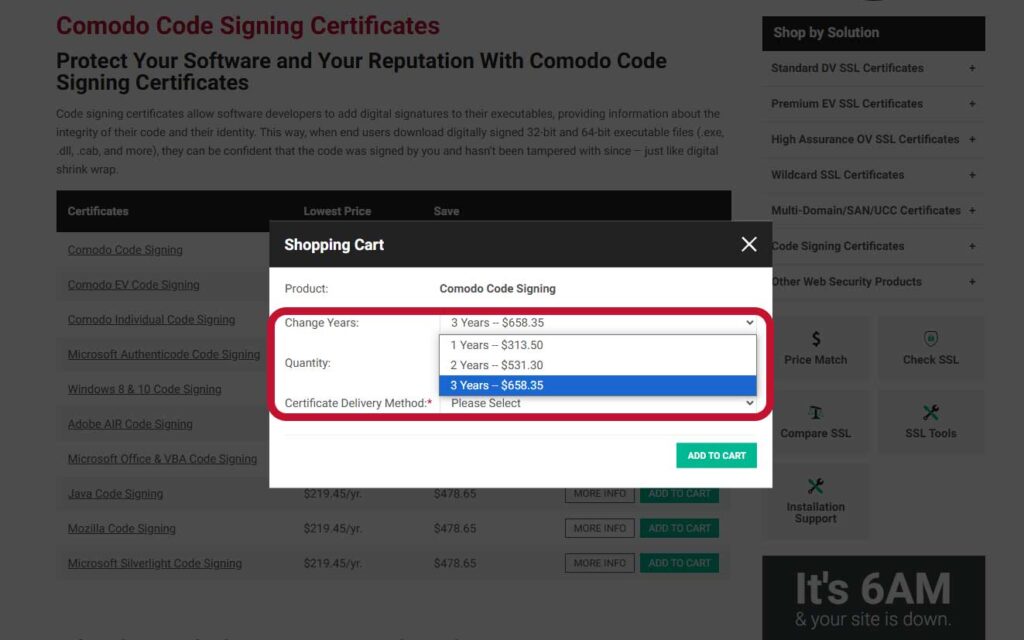
Browse our code signing certificate offerings for Microsoft Authenticode, Java code signing, and more. Select your code signing certificate of choice and hit the green Add to Cart button. This will bring up a new window where you can specify the number of coverage years for the certificate — i.e., up to about 3 years (or a maximum of 39 months) — and your preferred certificate delivery method.
In the top drop-down menu, select how many years you want the certificate to be good for:
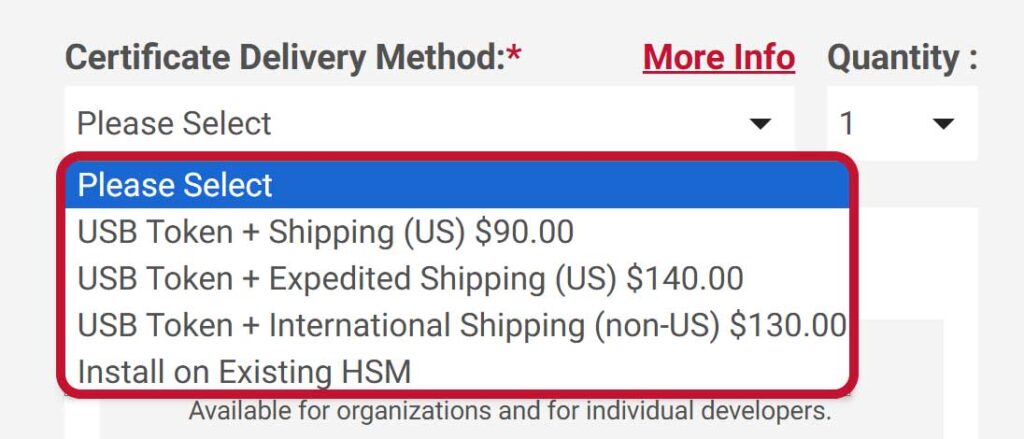
Next, select your preferred certificate delivery method, as shown in the screenshot below:
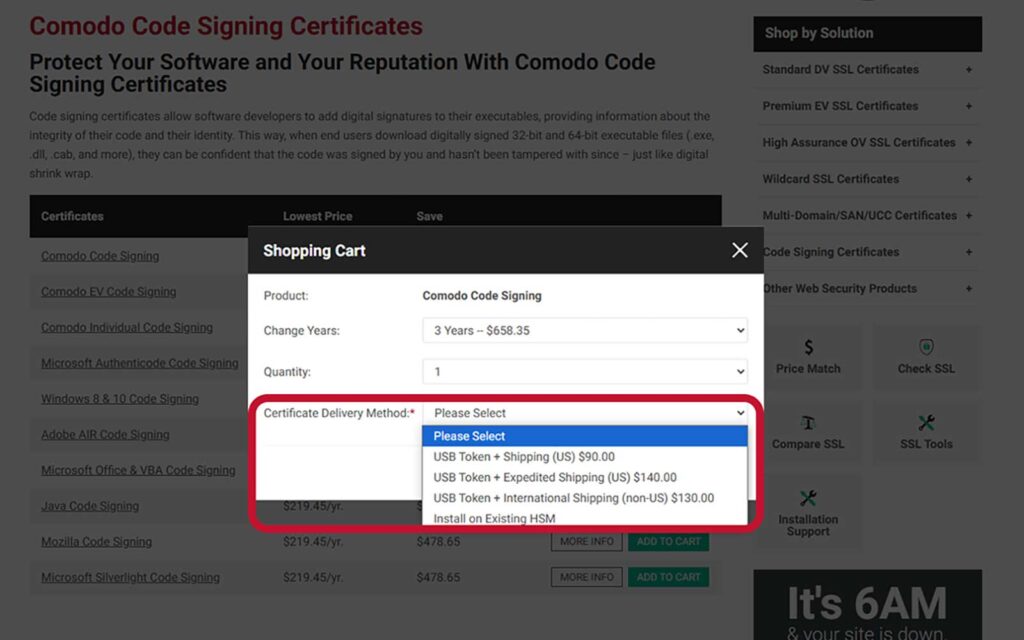
NOTE: Unless otherwise specified, all code signing certificates must be generated on secure hardware (i.e., FIPS 140-2 Level 2, Common Criteria EAL 4+, or equivalent compliant as a minimum). Comodo Code Signing Certificates, issued by Sectigo (formerly Comodo CA), are delivered on a secure hardware token by default.
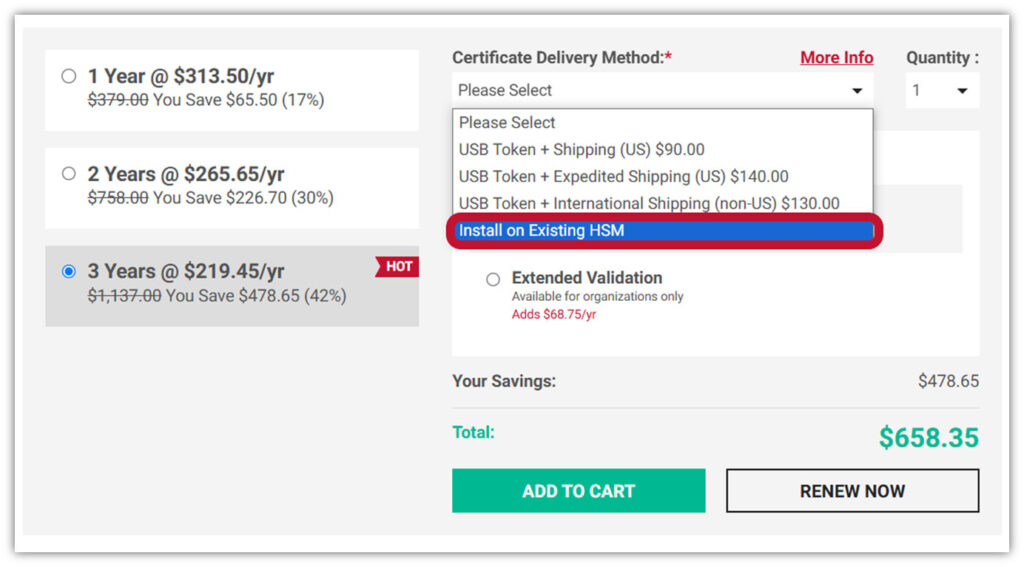
Already have a hardware security module (HSM) and want to install your certificate there? Select the Install on Existing HSM option in the certificate order drop-down menu (shown below) and continue with the checkout process. (Click the red More Info link to see which devices are supported.)
Are you a Google Cloud Key Management Service (Google Cloud KMS) user? We’ll walk you through how to set up a Comodo code signing certificate on Google Cloud KMS a little later in the article.
![]()
Ready to start signing your software and other executables in the cloud? You can with a Comodo Code Signing Certificate + Google Cloud KMS.
Get a Comodo Code Signing Certificate
We get it — times are tough for everyone right now, and everyone needs to save a few bucks whenever possible. Thankfully, ComodoSSLstore.com has some of the industry’s best prices on Comodo Code Signing Certificates and even offers a price-match guarantee.
Still looking for a better deal? Check out our SSL and code signing certificate coupons and promo codes to get an additional discount on your purchase from ComodoSSLstore.com.
Alright, this next part of the process varies based on the validation level of the code signing certificate you choose. For example, code signing certificates come in three validation levels, ranging from lowest to highest:
The validation process itself involves four key steps:
That’s it!
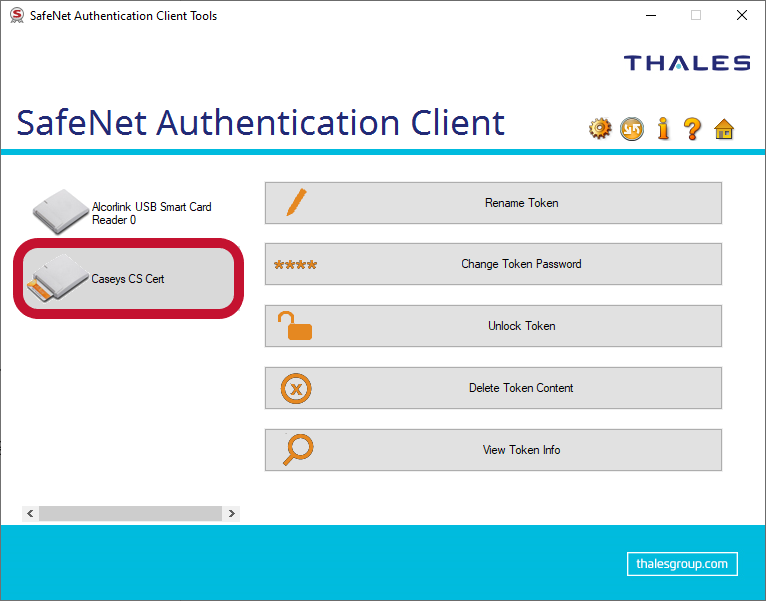
For this example, we’ll use a standard Comodo Code Signing Certificate that’s stored on a Thales SafeNet eToken.
Sectigo generates and stores the certificate and key on the secure eToken for you. This means you don’t have to mess around with provisioning a certificate and key yourself. After purchasing your Comodo Code Signing Certificate, all you have to do is sit back and wait for the eToken it’s stored on to arrive in the mail.
Once you’ve received your token, you’ll need to install the SafeNet Authentication Client onto your machine and go from there.
![]()
Want to sign your software to assure users and make installation easier? We sell all Comodo code signing certificates at up to 42% off.
View Code Signing Certificates
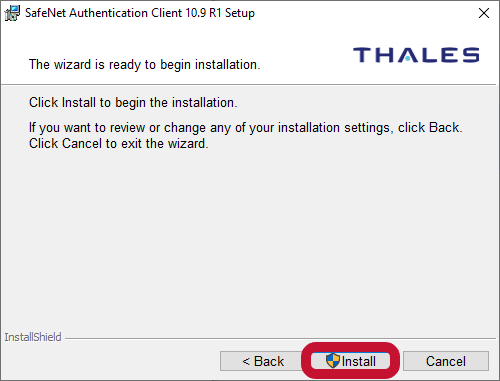
You can download the SafeNet Authentication Client (SAC) MSI installer file directly from the Sectigo website. To do this, simply locate your specific operating system (Windows, Linux, MacOS, etc.) and download the latest version of the SAC installer .zip file. Once downloaded, you’ll need to run the SafeNet Authentication Client installation wizard:

You’ll need to:
Once your selections are made, hit Install to begin the installation process:
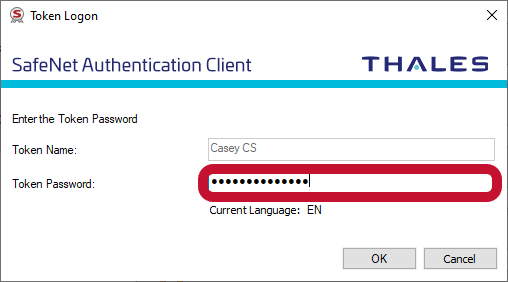
Once installed, go ahead and run the SafeNet Authentication Client application.
If you want to verify your certificate’s details, you can view which root certification authority (CA) issued your certificate information and when by clicking on the Advanced View icon (i.e., the cogwheel) in the top menu:
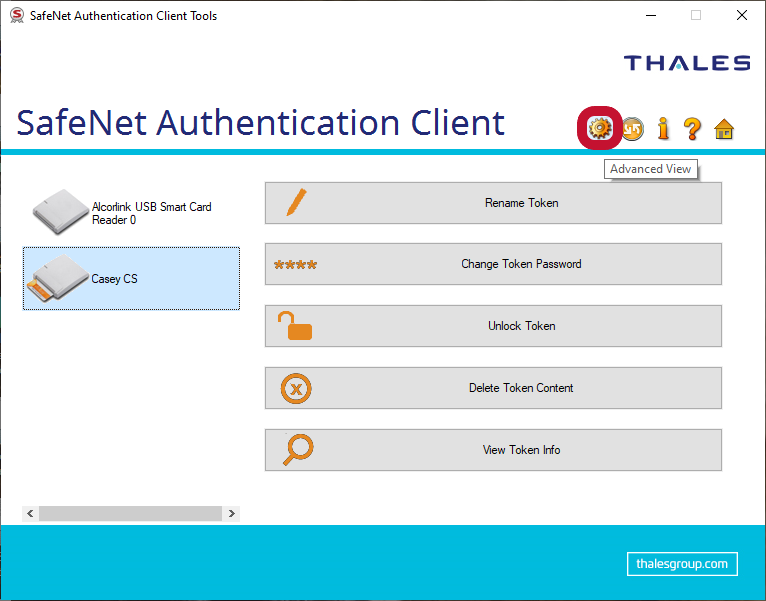
Select the User Certificates option in the left-hand navigation menu to display your certificate details:
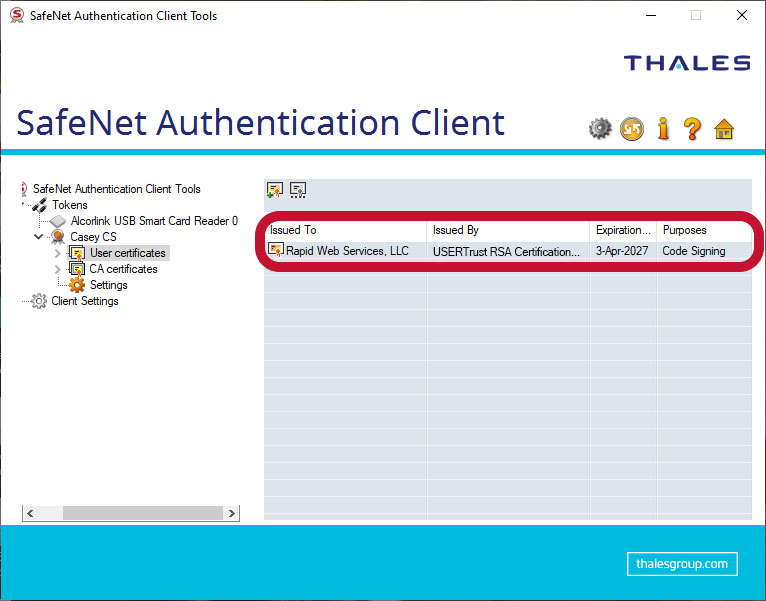
That’s it!
Remember earlier when we said you could use your existing (or a new) Google KMS account for code signing? Yeah, we’ve got your Comodo code signing certificate instructions for Google Cloud KMS right here. This cloud-based method is just one of the delivery methods offered for code signing certificates from ComodoSSLstore.com:
In a nutshell, you must complete several key steps before your certificate can be issued and added to your Google Cloud Key Management Service account:
Ready to get started, but need more information? Check out our ultimate guide (with screenshots) on how to set up Google KMS for cloud code signing.
We hope you’ve found these Comodo code signing certificate instructions both useful and informative. Our goal at ComodoSSLstore.com is to help educate and aid our customers, so they feel comfortable and confident using digital trust solutions.
