Quick Guide: How to Generate a Certificate Signing Request in cPanel

Rate this article: 1 Star2 Stars3 Stars4 Stars5 Stars (2 votes, average: 5.00)
Loading...

Get ready to start your clock — we’ll walk you through how to generate a CSR in cPanel in 60 seconds

A certificate signing request (CSR) is a crucial component of every SSL/TLS certificate. This is the information you provide to a certification authority (CA) to ask them to issue and digitally sign a certificate for your server. Knowing how to generate a certificate signing request is key information virtually every website administrator should have.

Without it, you can’t have a publicly trusted certificate to use on your website. Here’s how to generate a certificate signing request in cPanel in X steps.

1. Log in to cPanel on Your Domain

A screenshot of the cPanel login screen for an article on how to generate a certificate signing request in cPanel
Image caption: A screenshot of the cPanel login screen.

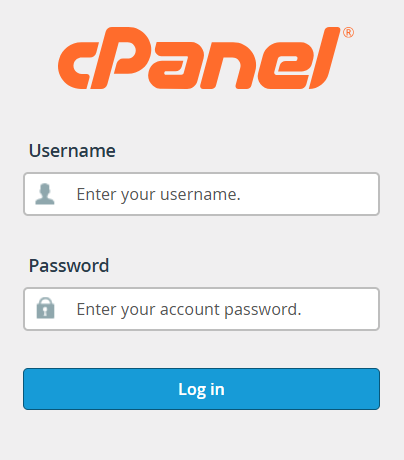
You’ll need to access your domain’s login page. For reference, a cPanel URL commonly looks like one of the following examples:

  • When using your domain name: your-domain.com/cpanel
  • When using your domain name: your-domain.com: 2083
  • When using your IP address: XXX.XXX.XXX.XXX: 2083

To sign in, use the login information your hosting provider should have sent in your initial welcome email. If you don’t have it, reach out to your hosting provider for assistance.

2. Access the SSL/TLS Menu

Scroll down to the Security section and select the SSL/TLS option.

A screenshot of the cPanel dashboard that shows where to find the SSL/TLS tool
Image caption: A screenshot captured in cPanel that shows where to access the SSL/TLS dashboard.

3. Select the CSR Generation Tool in cPanel

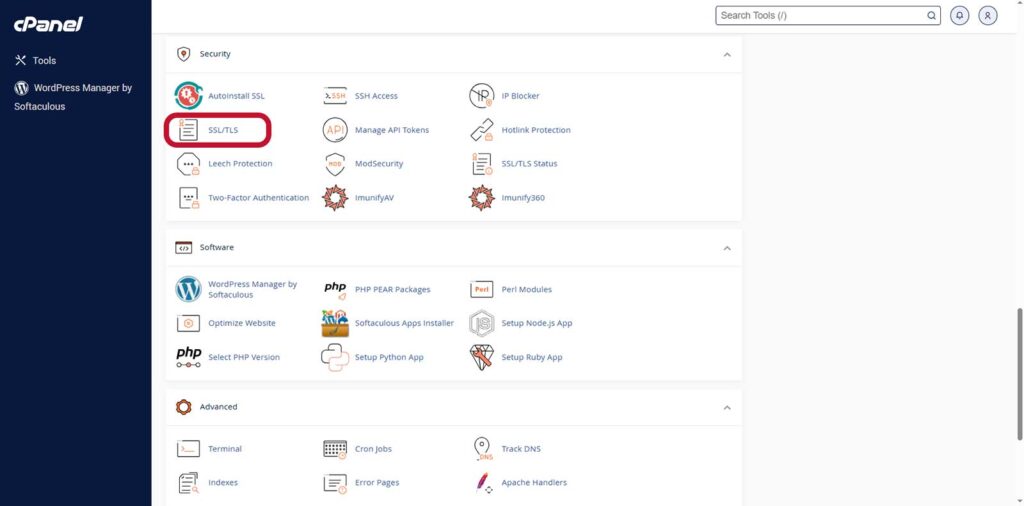
Select Generate, view, or delete SSL certificate signing requests from the right-hand list of options, as shown below. NOTE: If you want to change the key type, change the default selection in the main body section pictured below and hit Save.

A screenshot of the SSL/TLS dashboard that shows where to access the option to generate a certificate signing request in cPanel
Image caption: A screenshot showing where to access the form to generate a certificate signing request in cPanel.

4. Your Certificate Signing Request Details

This is where you’ll specify several key pieces of information, including:

  • cryptographic key type,
  • fully qualified domain name(s) (FQDNs),
  • organizational information and contact details (this info will be used as part of the certification authority’s [CA’s] validation process that comes a little later)
A screenshot with highlights calling out examples of some of the types of data that are needed when generating a CSR in cPanel (or other platforms)
Image caption: A screenshot that highlights the types of information required when creating a certificate signing request in cPanel.

5. Generate Your Certificate and Key

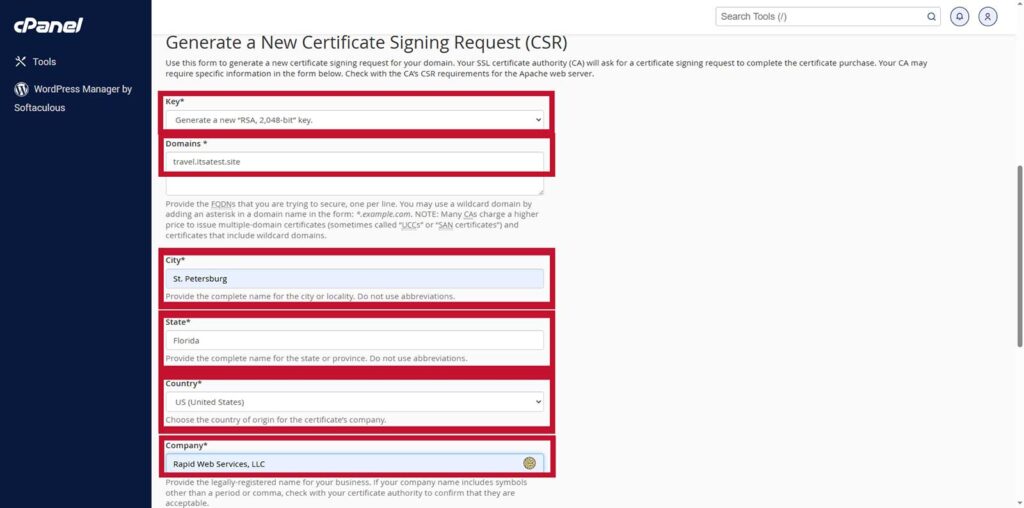
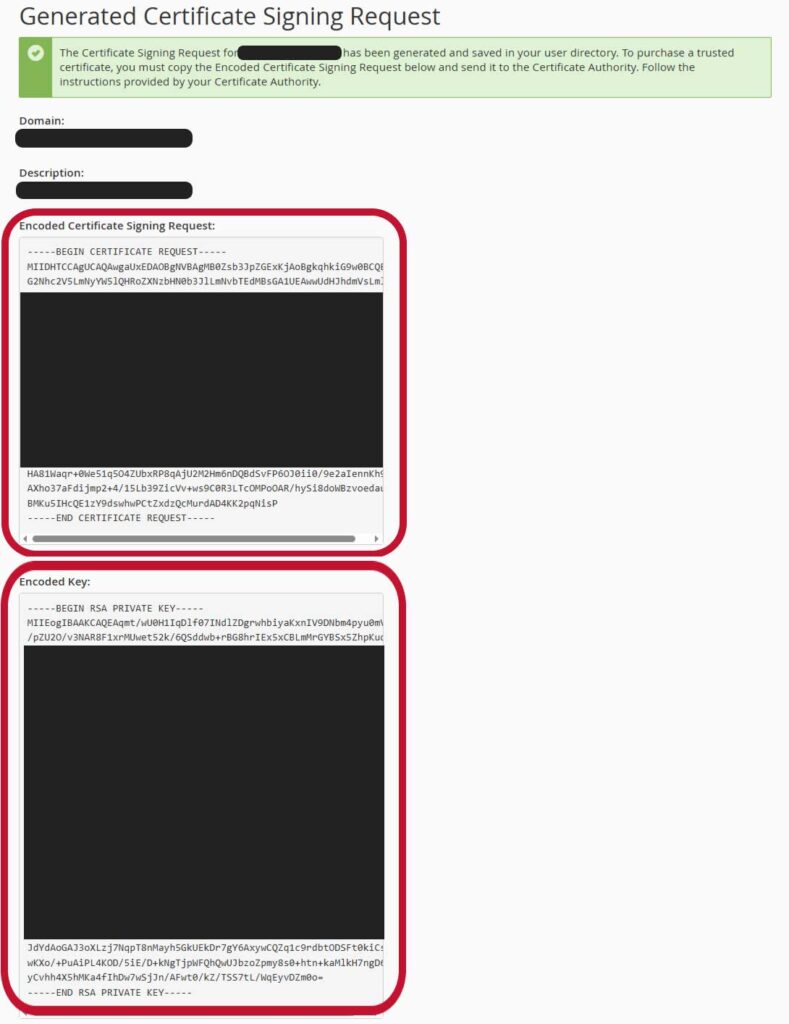
Double-check your information. If everything looks good to go, hit the Generate button to officially create your CSR and private key.

That’s it! Now, you have a certificate signing request that’s ready to send to your CA of choice as part of the certificate enrollment process.

An edited and truncated screenshot that removed irrelevant information to display just the necessary example CSR and private key-data.
Image caption: This edited and truncated example screenshot removes irrelevant information (e.g., the decoded CSR and private key data) while simultaneously calling out two key pieces of information.