Rate this article: 
 (5 votes, average: 4.20)
(5 votes, average: 4.20) (5 votes, average: 4.20)Not sure how to get an SSL certificate for your website? Understanding how to buy and set up an SSL/TLS certificate is easier than you think. This step-by-step guide walks you through how to get an SSL certificate with screenshots that help you stay on track.
On ComodoSSLstore.com, you have many SSL/TLS certificate options to choose from — everything from single to multi-domain certificates and those with basic and business validation. You can browse all certificates by brand and by certificate type:
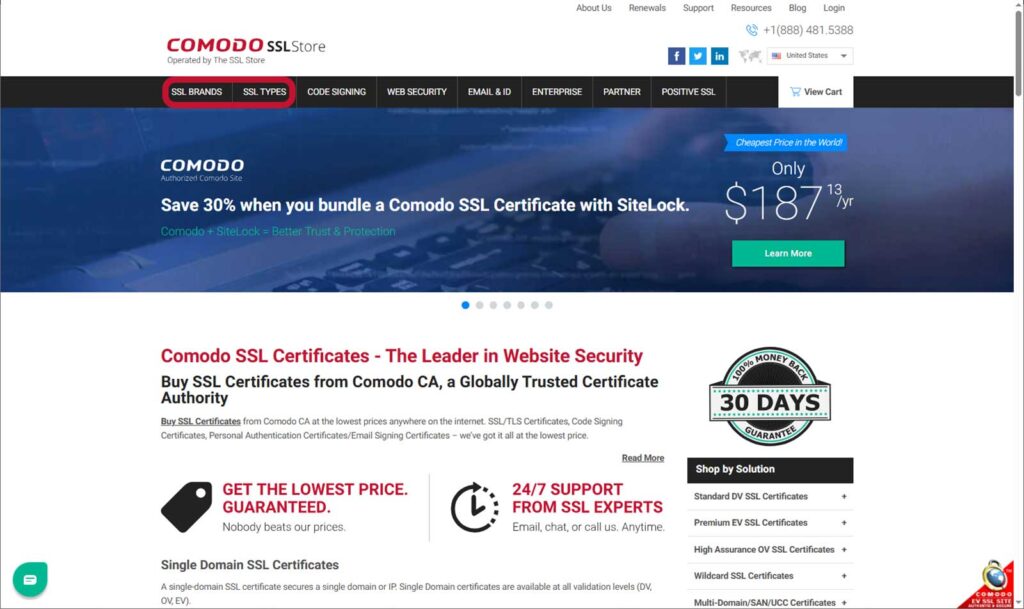
To find Comodo SSL/TLS certificates, select SSL Brands > Comodo SSL > and then select the certificate you want to use.
![]()
Get an SSL certificate that authenticates your identity and secures your site with prices as low as $7.95 per year!
Shop All SSL Certificates
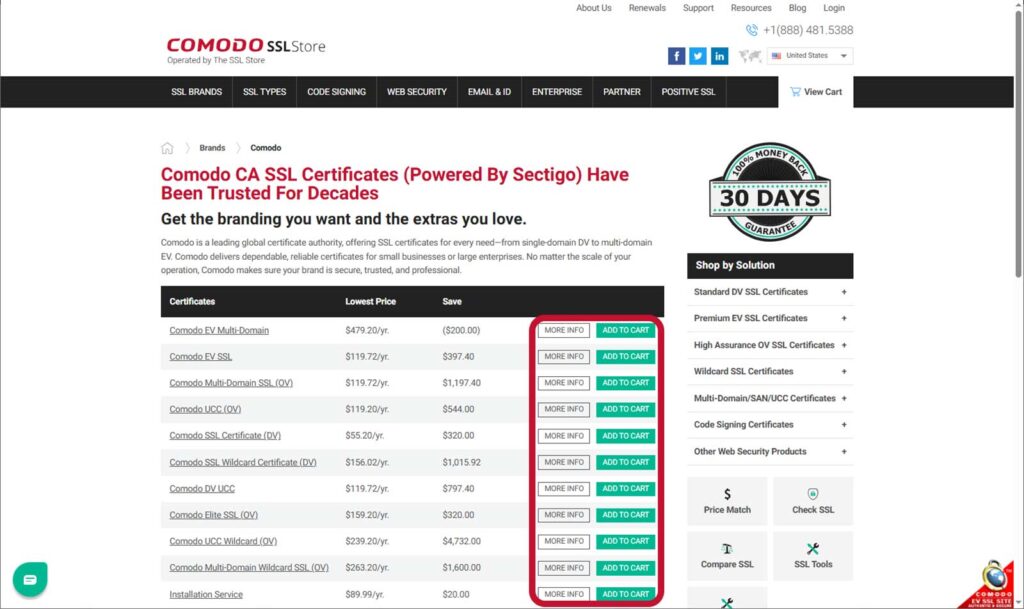
If you’re looking for the cheapest SSL certificates from Comodo? Search no more.
Once you’ve found the certificate you wish to use, select Add to Cart to start the purchase process.
In the following popup screen, select the number of years you want the certificate to cover your domain and the number of certificates to purchase.

Hit Add to Cart to navigate to the Secure Checkout screen.
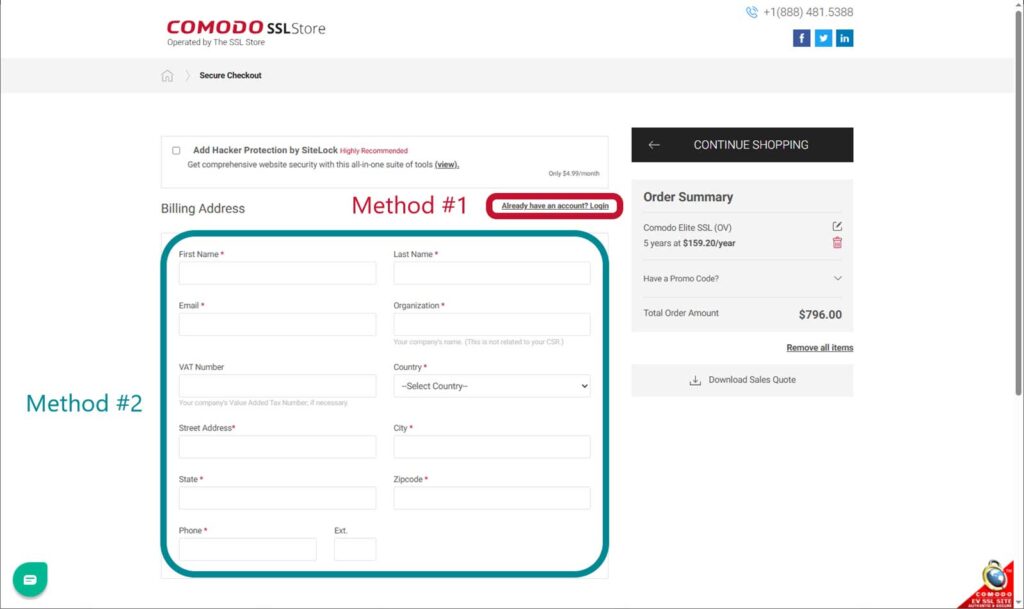
On the Secure Checkout screen, enter your personal and payment information manually (using the fields highlighted in teal). This will automatically create a new account for you using the specified email address. (We’ll speak a little more to that in just a few moments.)
Alternatively, select the Already have an account? Login button (circled in red) in the screenshot below. This will populate your information into those fields automatically.
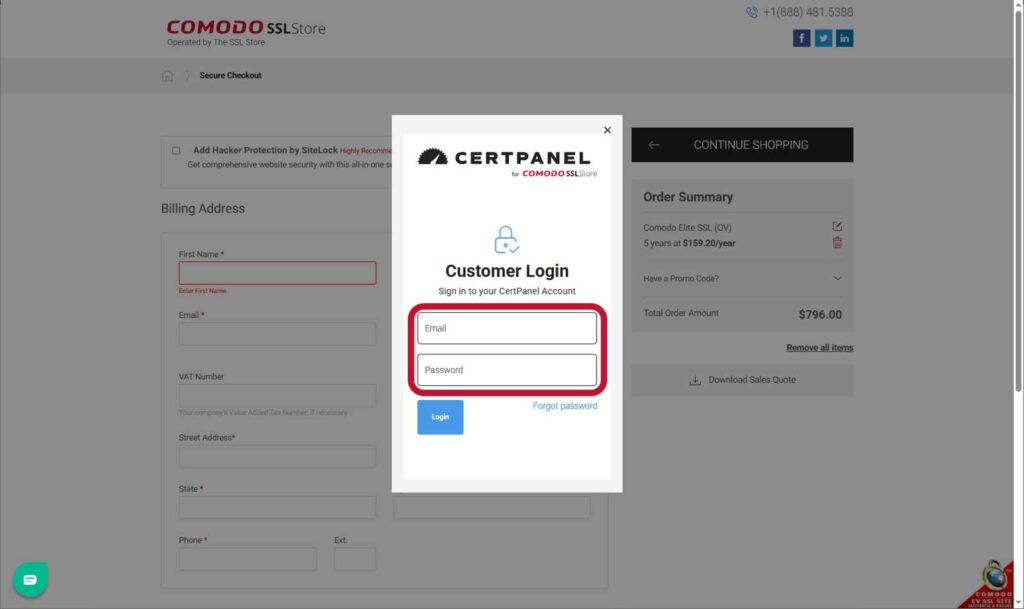
If you choose to use an existing account, you can enter your login credentials in the popup window, as shown below:
On the Secure Checkout screen, verify the Order Summary field information is correct. This screen is also where you can enter an SSL promo or coupon code, if you have one.
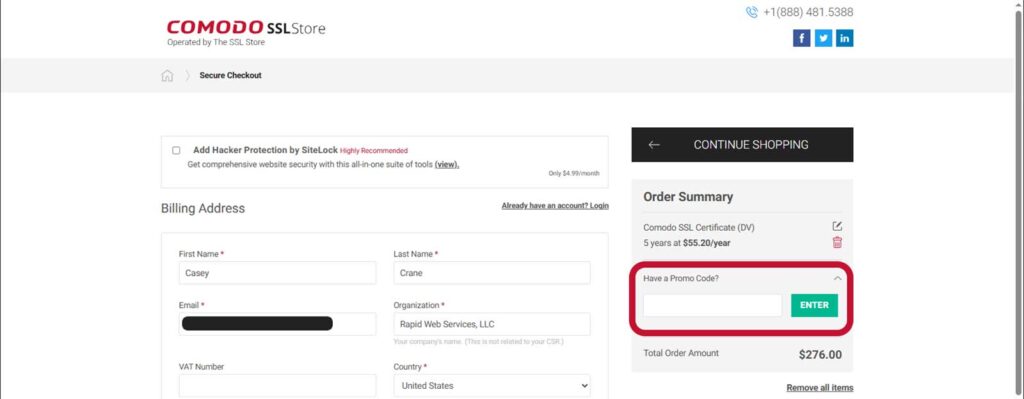
If everything looks good, scroll down and select the Place Order button.
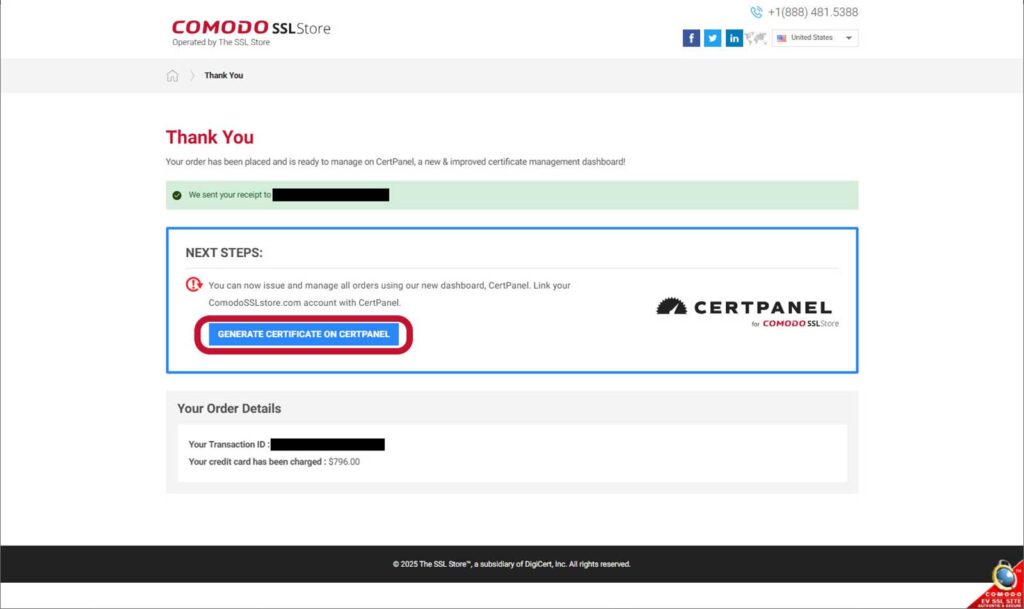
This next step will take you to the CertPanel dashboard where you can complete the Certificate Enrollment process.
If you don’t yet have a CertPanel account set up, no worries. This button will take you to a screen where you can set your password for your newly registered account:
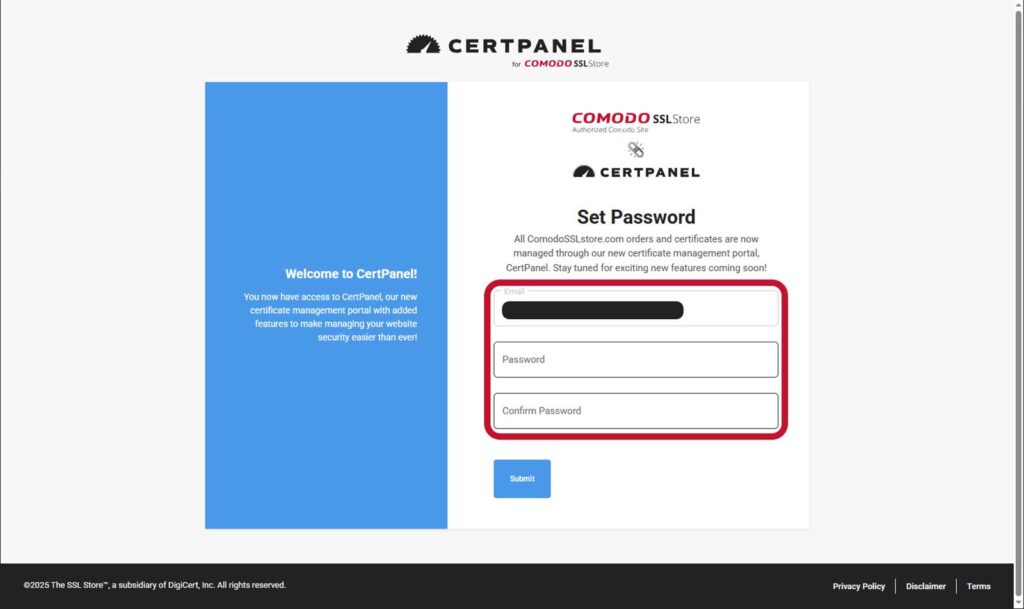
Simply enter the password you wish to use for your account and continue on to the Certificate Enrollment process.
To start the Certificate Enrollment process, select the Complete Certificate Enrollment button on the Manage Order screen, as shown below.
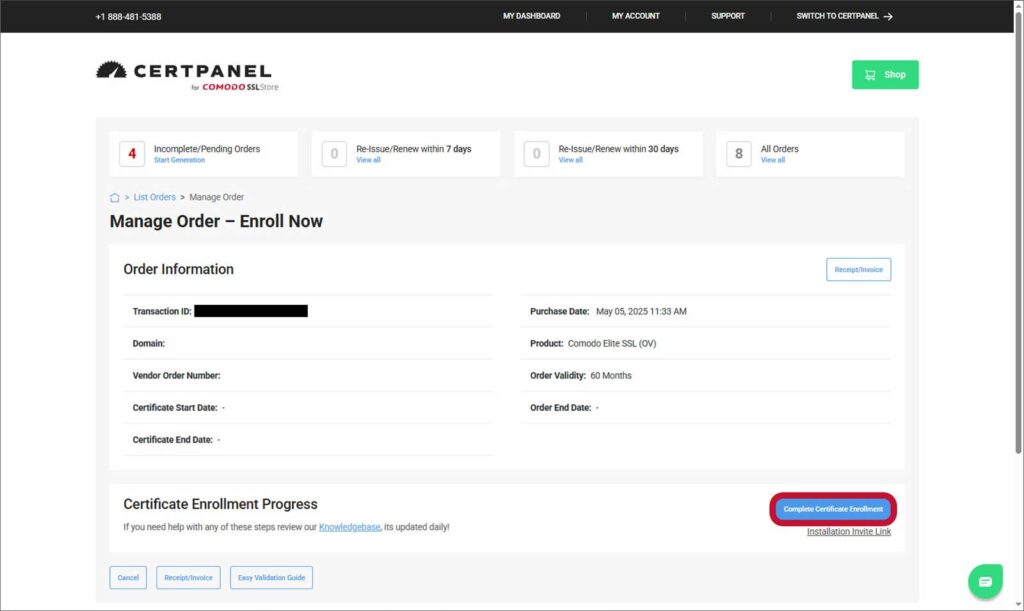
This will open the Certificate Enrollment wizard.
If you’ve purchased a basic domain validation (DV) SSL/TLS certificate, then you’ll jump in on the Domain step. Here, you’ll specify whether you’re choosing a New or Existing Domain, as shown below:

If you’ve purchased a basic wildcard SSL certificate, this is where you’ll want to specify the wildcard domain (e.g., *.itsatest.site) as the Common Name (CN). If you purchased a multi-domain wildcard, the CN must be a fully qualified domain name (FQDN).
Want to learn more? Check out our ultimate guide to wildcard SSL certificates.
After that, then you’ll move on to the installation method step (shown below) and continue from there.
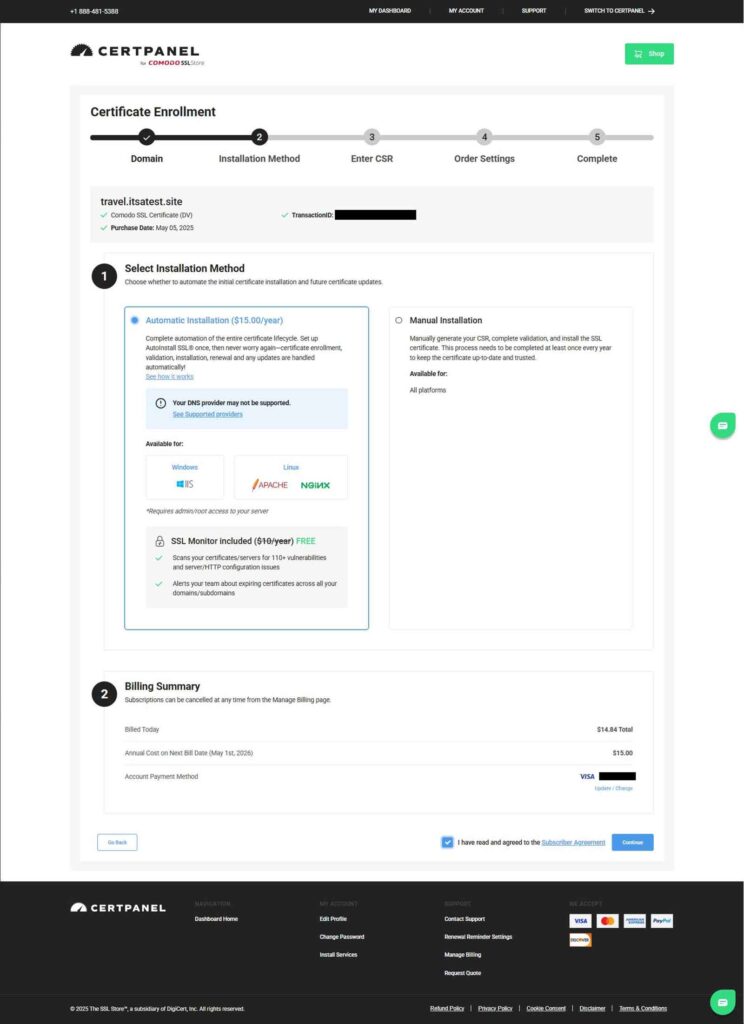
However, if you’ve purchased an organization validation (OV) or extended validation (EV) certificate, this process will look a little different. This is because you’ll jump in on the next step, which we’ll cover in the following section.
In the Certificate Enrollment wizard (shown below), select your order type and enter your certificate signing request (CSR) data. NOTE: The CSR, a string of random characters that starts with the message “—–BEGIN CERTIFICATE REQUEST—–” and ends with “—–END CERTIFICATE REQUEST—–”, can be generated using your server’s cPanel.
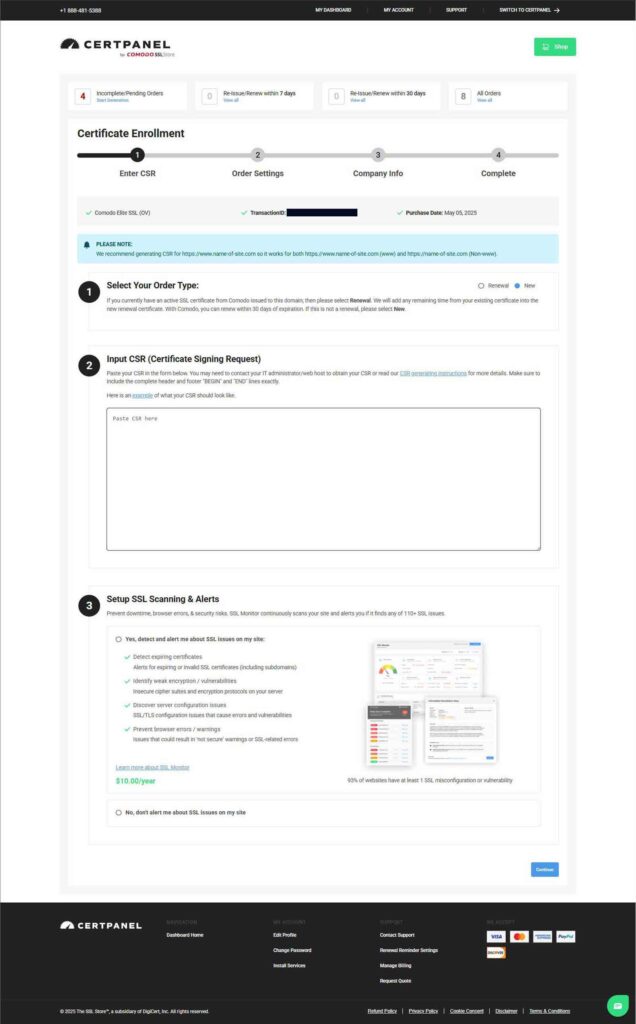
Hit Continue to move on to the next screen.
In the Order Settings screen (shown below), select your Domain Verification method in the drop-down menu.

For basic and multi-domain certificates, you have three validation methods to choose from:
(NOTE: The HTTP / HTTPS option is not available for wildcard and multi-domain wildcard certificates)
Next, either make an election in the Email Verification Settings (as shown in the second drop-down menu in the screenshot above) or jump straight to the Admin/Technical Contact section, depending on which method of validation you’ve selected.
Complete the Subscriber Agreement section and make your selections for Text/SMS Renewal Reminders and Enroll in AutoRenew. Hit Continue to move on to Step 3 of the Certificate Enrollment process.
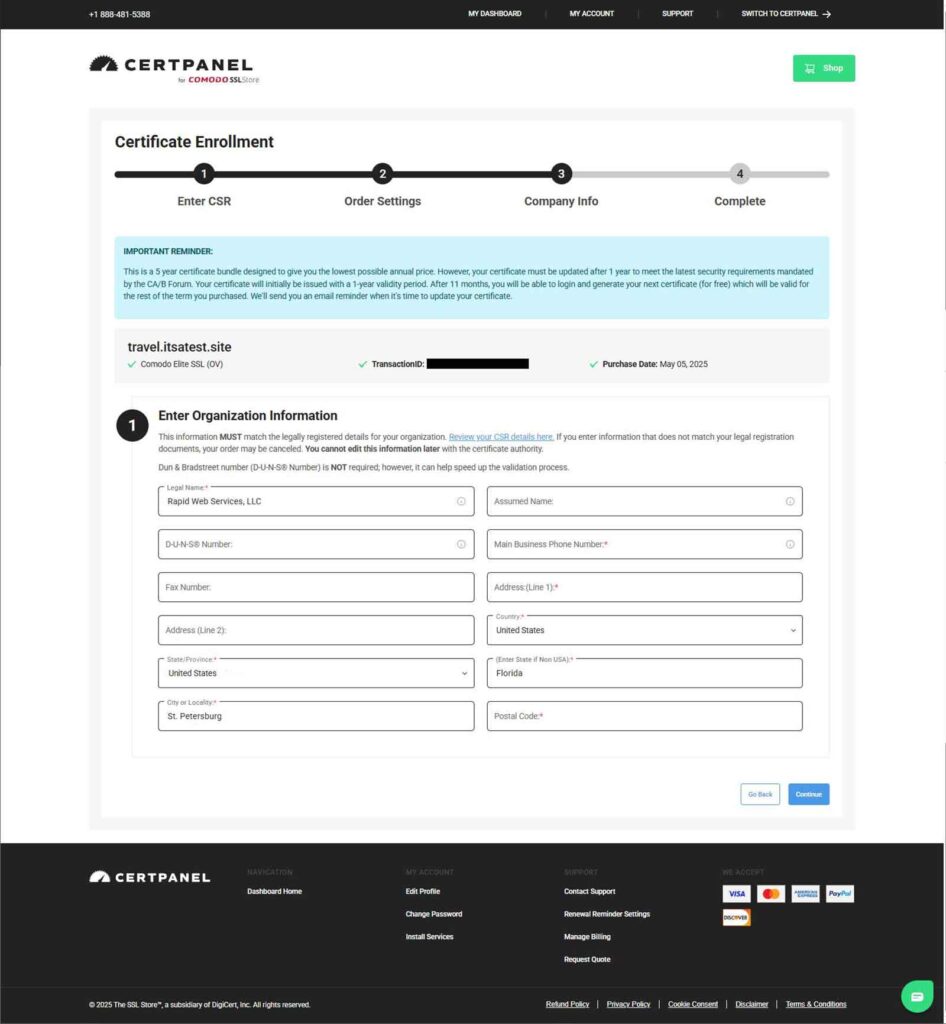
This is where you’ll enter your organization’s validation-related information (if you selected an organization validation [OV] certificate as a minimum). This includes information such as your organization’s legal name, phone number, and location-related information.
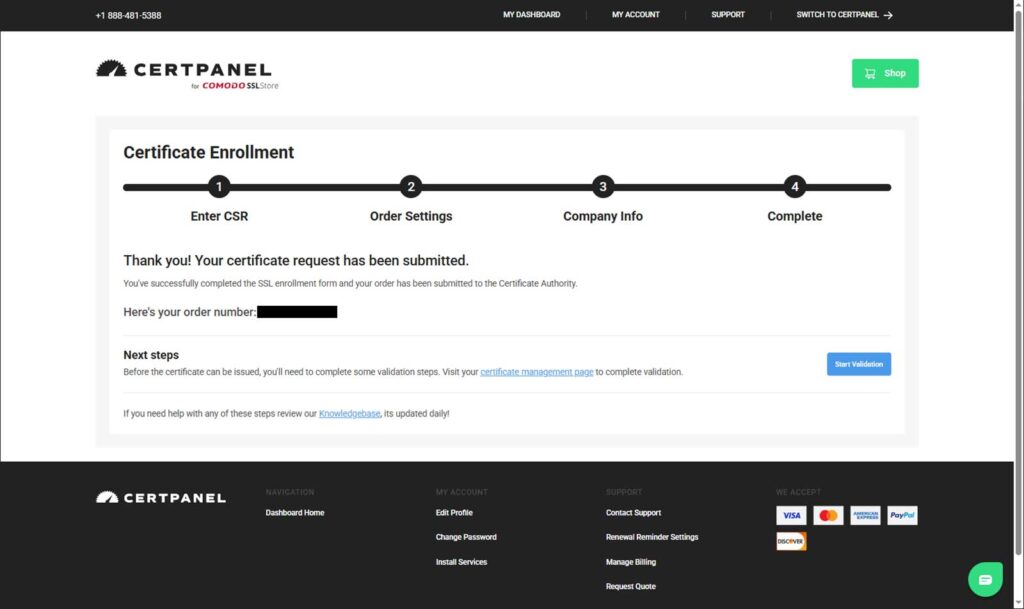
Once you’ve completed all of the required information, verify the details on the confirmation screen. If everything appears to be correct, select Submit Certificate Request.
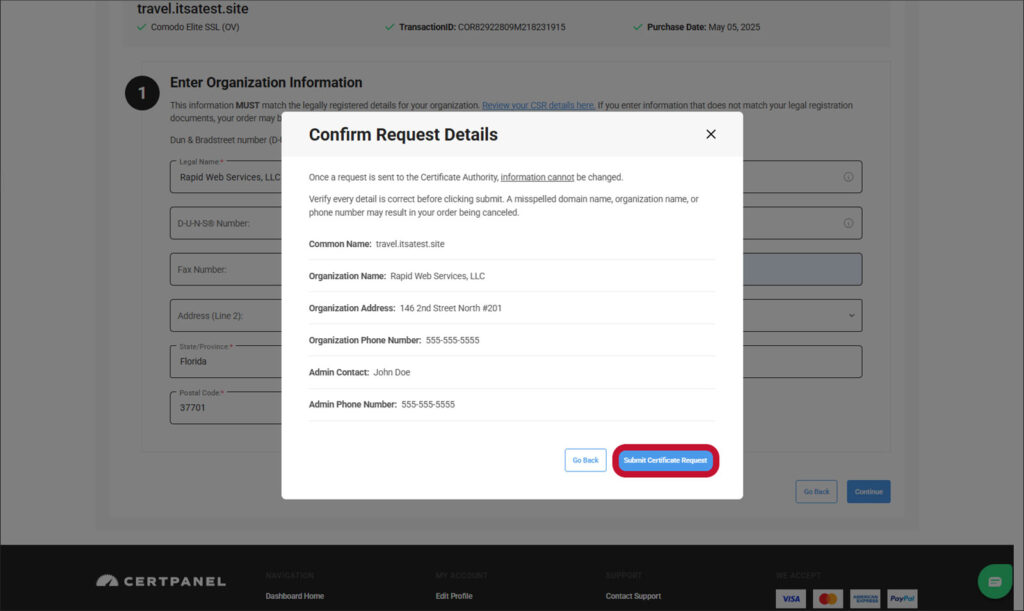
That’s it! You’ve now completed the purchase and certificate enrollment processes. Now, it’s time to start the validation process.
Select the Start Validation blue button on the right side of your screen to start the validation process:
SSL Monitor is our new tool that enables you to stay one step ahead of the curve by running monthly deep scans of your SSL/TLS certificates and server configurations. Furthermore, its daily scan feature helps you keep an eye on upcoming certificate expirations to avoid certificate-related outages.
Stay tuned for news about this incredible tool.
I hope this article has helped you figure out how to get SSL certificate for website. If you want the most cost-effective cheap SSL certificates, then go through the SSL certificates at ComodoSSLStore now.
