How to Add a Subject Alternative Name (SAN) to an SSL Certificate
We’ll walk you through how to add a subject alternative name (SAN) entry to a new or existing SSL/TLS multi-domain certificate
This guide on “how to add a subject alternative name in an SSL certificate” will walk you through adding SAN values to a new or existing single website security certificate using our CertPanel platform.
We’ve written this article in a way that approaches it from the perspective that either:
- You want to know how to add a subject alternative name to a new multi-domain SSL/TLS certificate you plan to purchase.
- You want to know how to add a SAN to an existing valid multi-domain SSL/TLS certificate.
Click on the numbered links above to choose your specific approach or just keep scrolling to get answers to some of your questions.
Before You Can Add a SAN to a Certificate, You First Need to Have One
You can’t add something to something you don’t have. So, to add subject alternative names (SANs) to certificates, you must either:
- buy and issue a new multi-domain SSL certificate as a new user, or
- re-issue an existing certificate to add SAN domains.
You can purchase a new certificate through ComodoSSLstore.com as a new user or by logging into your CertPanel account as an existing customer (as shown below).
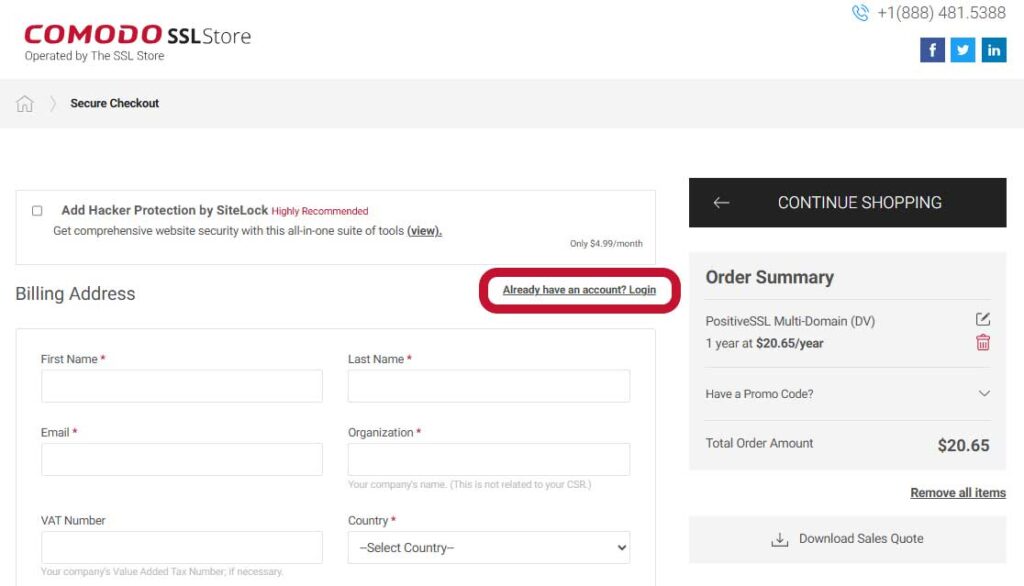
We have plenty of standard multi-domain and multi-domain wildcard SSL/TLS certificates to choose from. All SSL/TLS certificates purchased through ComodoSSLstore.com are managed through our CertPanel platform.
Don’t already have a CertPanel account? One will be created for you when purchasing a new SAN SSL/TLS certificate through ComodoSSLstore.com. You’ll be able to choose and confirm your password after making your purchase.
Once you’ve purchased your multi-domain SSL/TLS certificate, you can start the Certificate Enrollment process.
How to Add a Subject Alternative Name to a New Certificate
This guide will walk you through how to add a SAN to a new SSL/TLS certificate in CertPanel using cPanel for the certificate signing request (CSR) generation process:
Step 1: Start the Certificate Enrollment Process
In the main CertPanel dashboard:
- Look under All Orders and select View All.
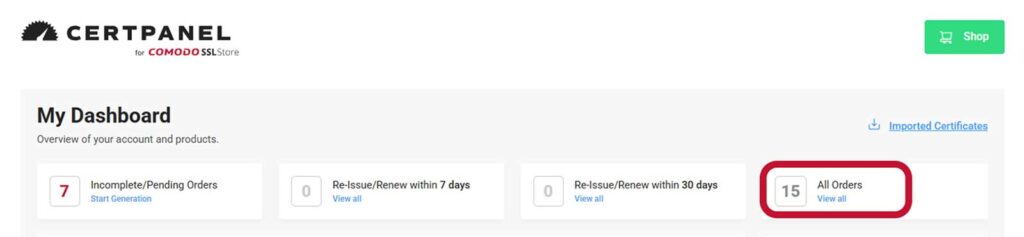
- Find your order and click the blue Get Started button.
- Choose whether it’s a New certificate or a Renewal. (In this case, you’ll select New.)
Step 2: Generate a New Certificate Signing Request (CSR)
You’ll need this information regardless of whether you’re getting a new multi-domain certificate or are reissuing an existing certificate to add new SAN data. To generate a certificate signing request in one of the following ways:
- Create a CSR directly on your server. Installation steps vary depending on the server software (Apache, NGINX, IIS). Visit the “How to Generate a CSR” page on our website for detailed guidance on this process for each platform.
- Generate a CSR using the generation tool in cPanel. We’ve got a quick guide on how to generate a certificate signing request in cPanel. It’s best to complete this process in a new browser tab that’s separate from the CertPanel Certificate Enrollment screen. (Wondering how to generate a CSR for a wildcard SSL certificate? We’ve got step-by-step directions and screenshots to walk you through that process, too.)
NOTE: Do not include subject alternative names (SANs) during the CSR generation process. The SANs will be added separately in the certificate generation process, which we will cover in step three.
If you include SANs in the CSR, you will need to generate a new CSR without them before proceeding. Ensure that the Common Name (CN) field contains the fully qualified domain name (FQDN) of the primary domain you want to secure. Example CSR fields:
Common Name (CN): example.com
SANs: (Leave this blank in the CSR)
This will generate your CSR data, which will look akin to the following redacted example:
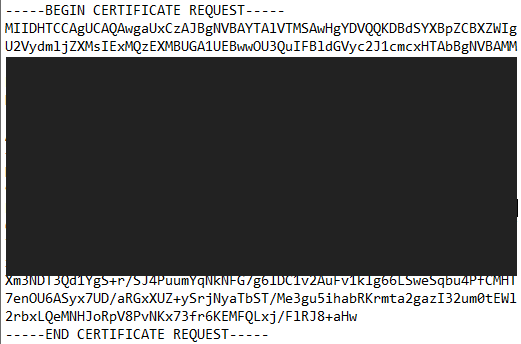
Be Sure to Save Your Certificate and Private Key for Future Reference!
Generating a CSR simultaneously creates the certificate’s private key. The private key is not stored by ComodoSSLstore.com or the certificate’s issuing CA and cannot be retrieved later. Copy and securely store your private key before proceeding.
If you lose your private key or it becomes compromised, you’ll need to reissue your certificate, generate a new CSR, and repeat the SSL certificate validation and installation processes.
Let AutoInstall SSL Handle Everything for You
CertPanel’s AutoInstall SSL feature clears your to-do list of the monotonous tasks associated with buying and installing an SSL certificate. This frees up your bandwidth, so you can focus on higher-priority projects that require your skills and expertise.
Step 3: Submit the CSR to ComodoSSLstore.com for SSL Validation
After generating the CSR, return to the CertPanel Certificate Enrollment tab in your browser. This is where you’ll submit the CSR to the certification authority (CA) that will issue your certificate.
Reminder: The CSR should not contain your SAN information, as SANs are added individually in the next step.
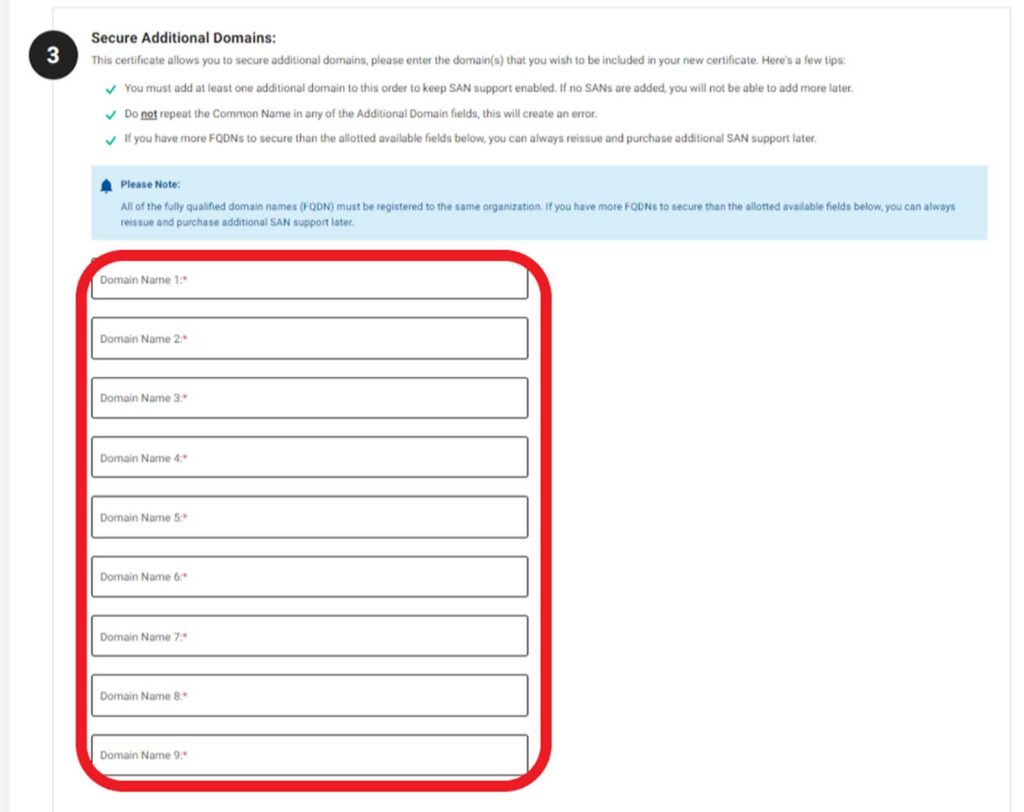
Step 3: Secure Your Subject Alternative Domains
Here, you’ll enter the additional domains (SANs) manually in the “Secure Additional Domains” section of the SSL certificate enrollment process. Be sure to include the WWW- or non-WWW version of your domain, as this may or may not automatically be covered under your certificate.
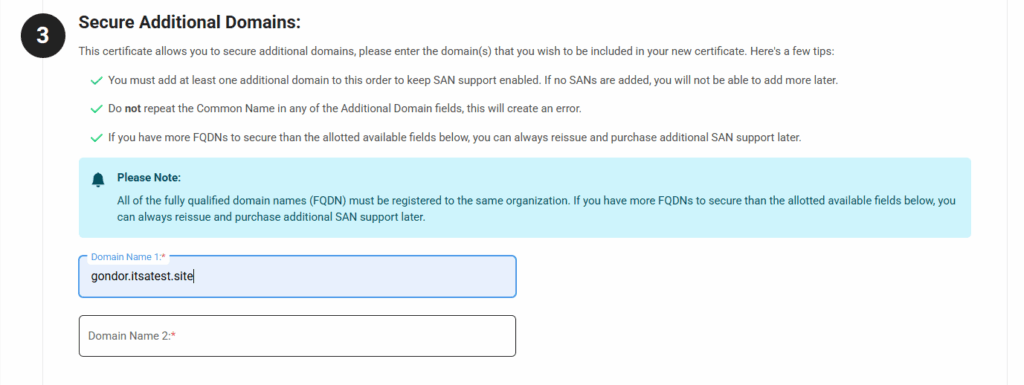
The CertPanel dashboard provides fields where you can input up to a total of 250 SANs (depending on the type of certificate and number of SANs you purchased — select certificates can secure up to a total of 1,000 domains). If you need to add more SANs than what you originally purchased (up to the max total), you can buy additional SANs and reissue the certificate. We’ll cover that process a little later in this article.
Step 4: Choose Your Domain Verification Method
Here, you’ll need to choose your preferred method of domain validation:
- Email-based validation: The issuing CA sends an email containing a verification link to the domain’s admin contact (e.g., [email protected]).
- DNS validation: This process involves creating a specific CNAME record in your domain’s DNS settings that the CA must verify prior to issuing the certificate.
- File-based validation (RECOMMENDED): This approach involves uploading a unique verification file from the CA to your website’s public directory (e.g., /.well-known/pki-validation).
Step 5: Provide Other Contact Information Certificate Details
Next, provide your organization’s contact info (e.g., a technical contact) and other details for the certificate. Once you’ve provided this info, you must agree to the required subscriber acknowledgements before moving on to the validation phase.
Step 6: Complete the Validation Process
The SSL certificate authority (CA) requires proof that you own or manage the domains listed in your certificate.
Complete the Required Validation Steps
You will validate your domain using your chosen method that was specified in the certificate enrollment process:
- If you selected the email validation method: Click the verification link you received via email to approve the request.
- If you chose the DNS validation method: Wait while the CA verifies the CNAME record you created before issuing the certificate.
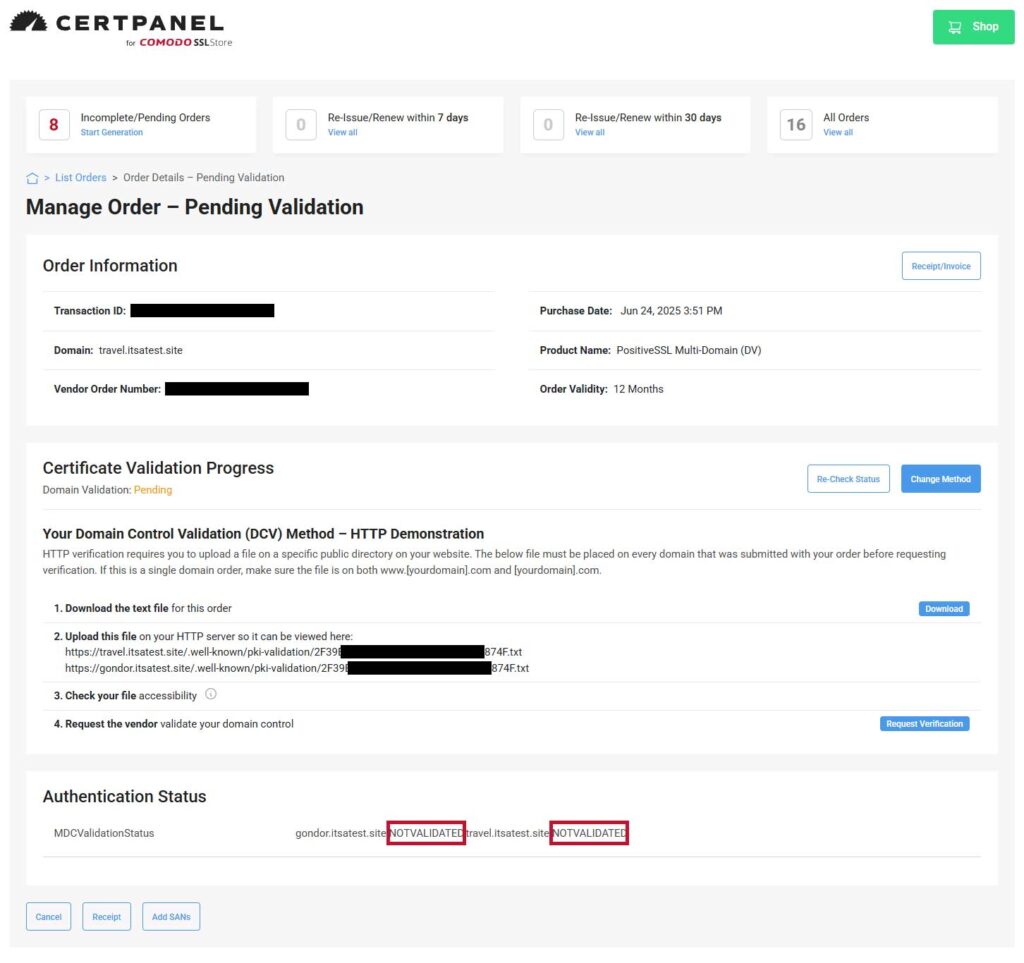
- If you opted for the file-based validation method. Upload the unique verification file (provided by the CA) to the specified directory and wait for the CA to validate it.
For example, if you choose to use HTTP file-based validation, here’s a quick look at how it looks in CertPanel while your domain is awaiting validation:
Wait for Validation Approval
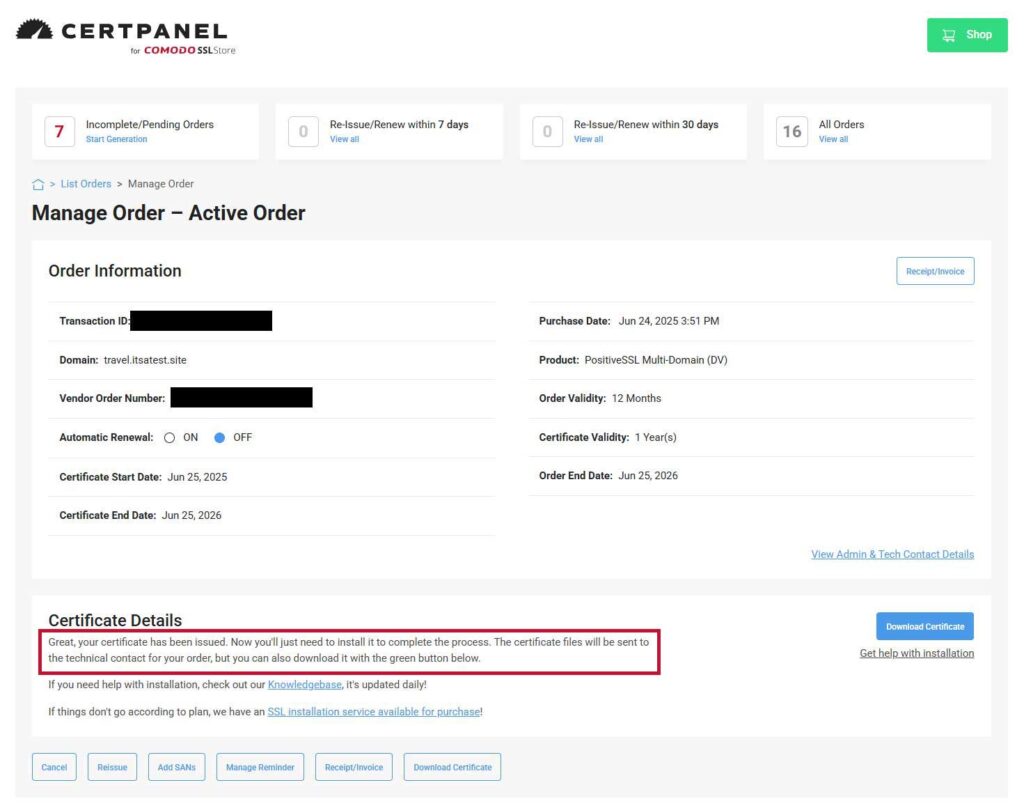
Once the domain validation is complete, the SSL provider will issue your certificate. Again, the processing times depend on the type of validation method used.
Step 7. Download and Install the Certificate
Once your domain is successfully validated and the CA has issued your certificate, you’ll be able to download the issued certificate from the CertPanel dashboard.
The next step is to install the SSL certificate on your web server. This installation process, which involves uploading your certificate and private key, can be completed through your site’s cPanel dashboard.
Looking for step-by-step instructions on how to install an SSL certificate on cPanel and WHM? Look no further.
Note: Installation steps vary depending on the server software (Apache, NGINX, IIS). Visit the “How to Install a Certificate” page on our website for detailed guidance on this process for each server platform.
Streamline Your Security with SAN SSL Certificates
Protect up to 250 domains with a single SAN SSL certificate starting at $116.82/year. Simplify your SSL management and save on costs by using a single certificate.
Current SSL Users: How to Add a SAN to an Existing Certificate
Now, it’s time to switch gears. If you’re an existing customer and need to add one or more subject alternative name domains to your existing certificate, you first must reissue your certificate. (This is true for all publicly trusted SSL/TLS certificates.)
Step 1. Access Your Order in the CertPanel Dashboard
- Log in to your CertPanel account. Haven’t linked your ComodoSSLstore.com account to CertPanel yet? Here’s how to link your account to CertPanel.
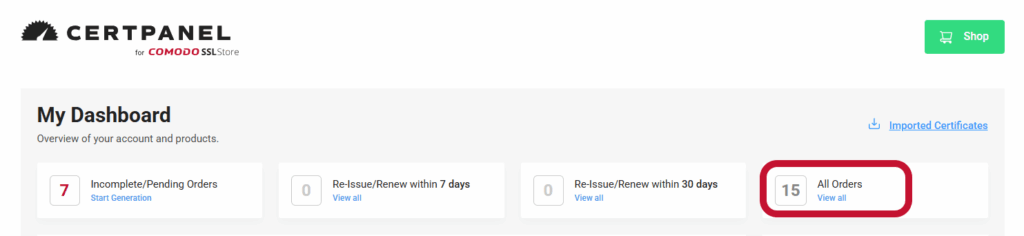
- In your dashboard, click View All under All Orders (as shown below)
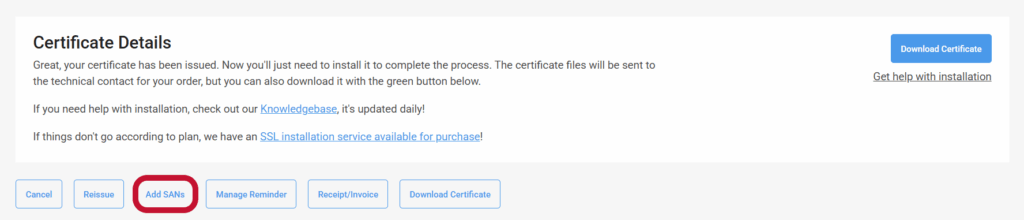
- Find the certificate you want to reissue to access the Manage Order screen. Click on the order, scroll down to the Certificate Details section, and select the Add SANs button on the next screen (as shown below):
Step 2. Purchase Additional SANs for Your Existing Certificate Order
If you have open SAN fields available, you can skip this step and move on to step 3. But if you don’t have unused domain slots, then you’ll need to purchase additional SANs before you can move on to step 3.
Select the number of SANs you need to add to your certificate and complete your purchase. You can have up to a total of 250 or 1,000 covered domains in all (depending on which multi-domain certificate you’re using).
Step 3. Reissue Your Certificate
Click the Reissue button to initiate the certificate reissuance process.
Step 4. Complete the Certificate Enrollment Process
This process is largely similar to the steps we covered previously in the directions for new certificate users:
- Generate and add a new CSR. The old one will no longer be valid.
- Name all of the SANs you’re adding to the certificate. This requires an abbreviated version of the certificate enrollment process. (This step can’t be avoided, however, as your original certificate and its CSR will no longer be valid.)

Step 5. Complete Validation for Each Added Domain
- Complete the validation process. You must complete validation for each new SAN domain that you’ve added to the certificate.
- Download and install your certificate. Once the validation process is complete and your reissued certificate is available to download in CertPanel, it’s time to install it on your web server.
- Cross your t’s and dot your i’s. Finally, you’ll need to verify that the certificates are properly configured and installed by checking each SAN domain.
Want to learn more about how to reissue a certificate? Check out our related resource by clicking on the previous link.
Still have questions? We’ve got answers.
FAQs About How to Add a SAN to a Certificate
What is a SAN or a SAN certificate?
A subject alternative name, or SAN, is an alternative domain that you may be able to cover under your SSL/TLS certificate. A SAN certificate, or what’s also known as a multi-domain SSL/TLS certificate, enables you to secure up to 1,000 domains total (depending on the certificate you choose) under a single certificate.
How do I ensure my WWW domain is also included on my certificate?
In some cases, the WWW may count as a SAN. The answer to how to add a SAN to your certificate depends on which type of certificate you’re buying or using:
- When WWW- and non-WWW domains are covered by default. If you have a standard Comodo single-domain SSL/TLS certificate from ComodoSSLstore.com, then the WW- (www.itsatest.site) and non-WWW (itsatest.site) variations of your domain will be covered by default. The same goes for our basic wildcard SSL/TLS certificates.
- When WWW- and non-WWW domains must be manually added. If you’re using a multi-domain or multi-domain wildcard SSL/TLS certificate, then you’ll need to add separate SANs to cover both varieties of your domain.
Can I add additional SANs (other than WWW) to a standard SSL/TLS Certificate?
No. Standard SSL/TLS certificates cover only a single domain (itsatest.site) and its WWW alternative (www.itsatest.site). You can’t add additional SANs to the certificate; you’d need to use a multi-domain SSL/TLS certificate instead.
How do I add additional SANS to my multi-domain SSL/TLS certificate?
Let’s imagine you added 150 domains when you initially set up your multi-domain SSL/TLS certificate. Now, you find yourself wanting to add another 10 SAN domains. You can do this by purchasing additional SANs for your certificate.
Log into your account, then navigate to All Orders and select the Order ID/Domain Name. Scroll to the bottom of your Managing Orders page and you’ll the Add SANs button, as shown below:
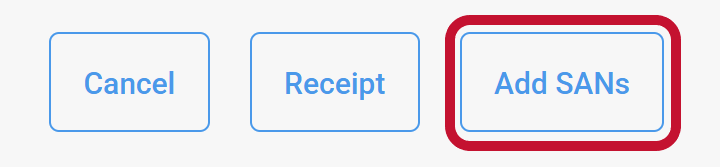
This will bring up the Purchase Additional SANs page, where you can add more domains to your certificate. However, you’re not quite done. You also must re-issue your certificate, submit a new CSR, and undergo validation for your SANs, because your original certificate and CSR info will no longer be valid.